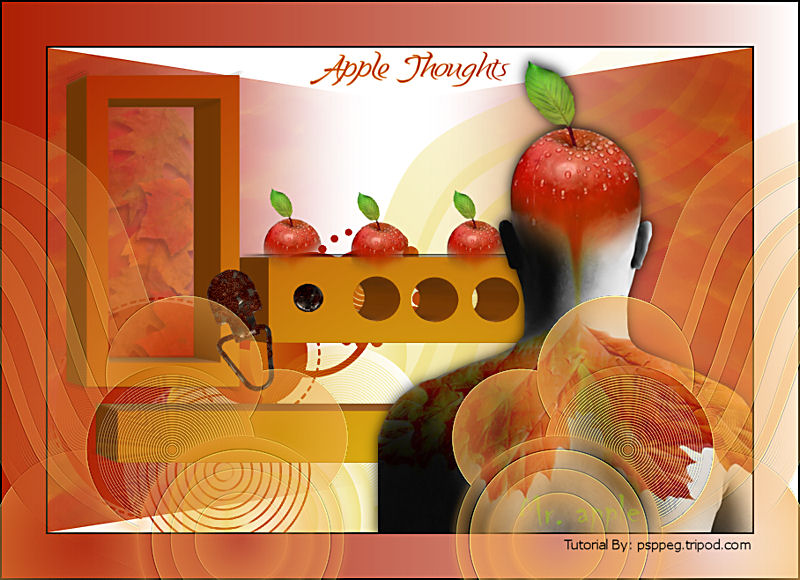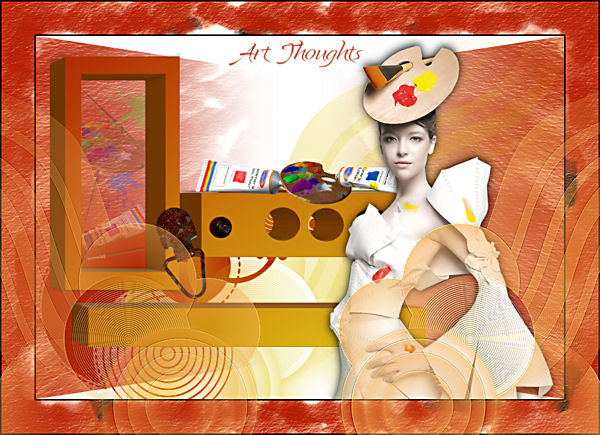
Apple Thoughts
This tutorial can be created in a variety of ways
Filters Required:
Impressionist
Eye Candy 5 Impact and Nature
If you need a filter..select the linked image below and scroll down the page.

------------------------
Tubes Required:
Main Tube Mr. Apple
elements
Selections and a Mask
Main Tube: Mr. Apple
Tubed by: Sév_Guismo
Sév_Guismo has provided psppeg with permission to use the tube Mr. Apple in this tutorial.
To view more Fantastic Tubes by the Tuber Sév_Guismo click image below.

Many Thanks Sev
------------------------
Materials
------------------------
|
Preparation:
Look thru the list of filters and make certain you have them.
Add the Selections to your Selection Folder.
Double Click the Eye Candy Presets. This places them into your program.
Open all tubes in your psp program and minimize.
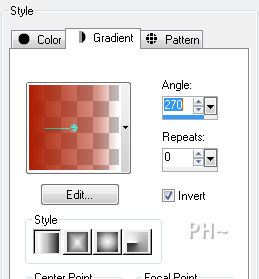
Material Palette - Set foreground to #ac1f04 and background to #e6810a. Set Foreground to Gradient - Style Linear, Gradient Fading Foreground, Angle 270, Repeats 0, Invert checked.

Lets Begin:
A)Background
1)File, New Image, 800wx550h, White.
2)Layers - New Raster Layer.
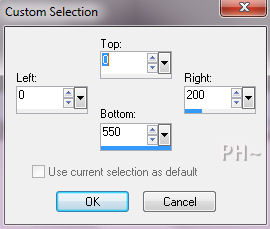
3)Selection Tool - Custom Selection - Left, Top 0, Right 200, Bottom 550.

4)Flood Fill with Gradient
5)Selections - Select None.
6)Adjust- Blur - Gaussian Blur - Radius: 38.
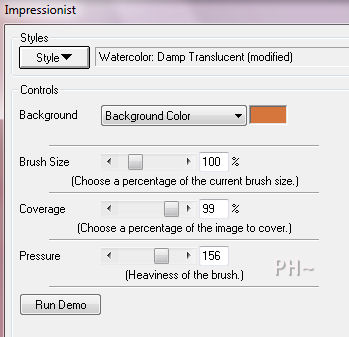
7)Effects - Plugins - Impressionist - Change Style to Watercolor: Damp Translucent - Background to Background.

8)Effects - Geometric Effects - Horizontal Perspective - Distortion: 45, Transparent.
9)Layers - Duplicate
10)Image - Mirror
11)Layers - Merge - Merge Visable.
B)Background Elements
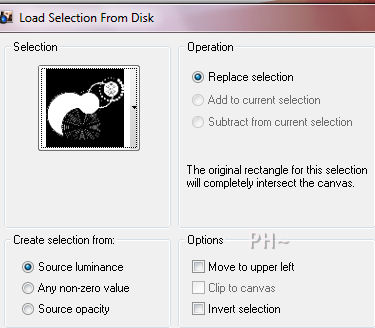
1)Selections - Load/Save Selection - Load Selection from Disk - Load psppeg_at1.sel.

2)Layers - New Raster Layer
3)Material Palette - Change Foreground from Gradient back to Solid Color.
4)Flood Fill Selection.
5)Selections - Select None.
C)Background Elements 2
1)Selections - Load/Save Selection - Load Selection from Disk - Load psppeg_at2.sel.
2)Layers - New Raster Layer
3)Material Palette - Change Foreground to #e0c514.
4)Flood Fill Selection.
5)Selections - Select None.
6)Layer Palette - Blend Mode: Normal, Opacity: 60.
D)Main Tube
1)Maximize calguismisterapple26082011.psp - Edit - Copy - Close image - Edit - Paste As a New Layer.
2)Image - Resize - 45%, all layers unchecked.
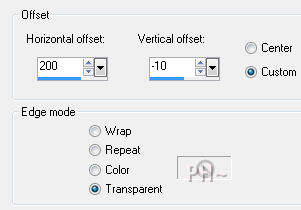
3)Effects - Image Effects - Offset - 200, minus 10, transparent.

4)Selections - Load/Save Selection - Load Selection from Disk - Load psppeg_at3.sel.
5)Selections - Promote Selection to Layer
6)Selections - Select None.
7)Image - Resize - Same Settings.
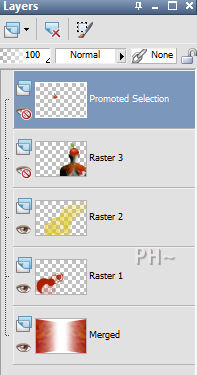
8)Layer Palette - Turn off Visability to the top two layers. (We will come back to these layers in a short while.)

E) Mask Layer
1)Layers - New Raster Layer
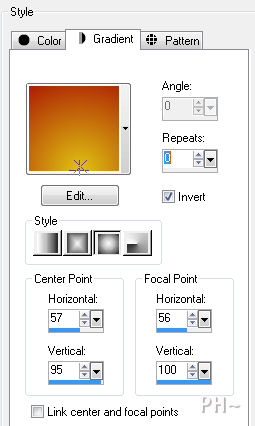
2)Material Palette - Change Foreground Color to #ac1f04, Background Color to #e0c514. Change Background to Gradient - Style Sunburst - Foreground Background Gradient.

3)Flood Fill with Gradient.
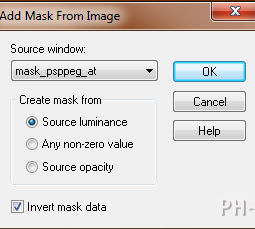
4)Layers - New Mask Layer - From Image - Select mask_psppeg_at, Source Luminance, Invert Checked

5)Layers - Merge - Merge Group.
6)Effects - Plugins - Eye Candy 5 Impact - Extrude - Settings Tab: Select psppeg_ext1.
F)Finishing Apples
1)Layer Palette - Turn Visability of the Apple Selection Layer back on.(Layer Second From Top)Select.
2)Layers - Duplicate - Twice.
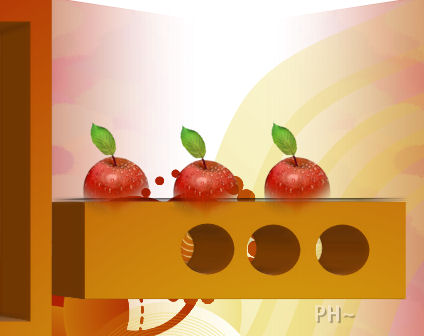
3)Mover Tool - Position the three apples in a row as shown below.

4)Layer Palette - Select Layer Second From Top.
5)Layers - Merge - Merge Down, Repeat. All 3 apples on one layer.
6)Make certain none of the blur shows, if so move the apples down more with the Mover Tool.
G)Adding More Elements
1)Layer Palette - Select Top Layer, the Mask Layer.
2)Magic Wand Tool - Tolerance and Feather 0 - Select Center of Box Left of Apples.
3)Selections - Modify - Expand by 2.
4)Layer Palette - Select Layer Below Mask Layer.
5)Layers - Add New Raster Layer.
6)Maximize element1_psppeg_apple.psp - Edit - Copy - Close Tube - Edit - Paste - Paste Into Selection.
7)Selections - Select None.
8)Layer Palette - Blend Mode: Normal, Opacity: 30.
H)Adding More Elements
1)Layer Palette - Select Top Layer.
2)Maximize etc_dan_ssbeach_Hanger.psp - Edit - Copy - Layer One - Edit - Paste - Paste As a New Layer.
Image - Resize - Resize 20%, all Layers Unchecked.
Image - Flip
3)Maximize etc_dan_ssbeach_Hanger.psp - Edit - Copy - Layer Two - Close Tube - Edit - Paste - Paste As a New Layer.
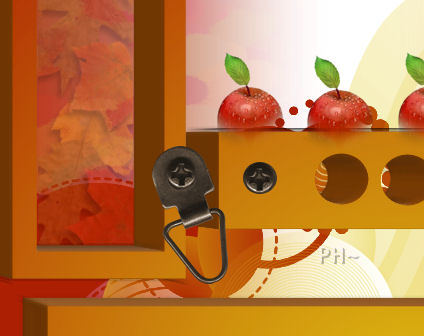
4)Mover Tool - Position as Shown Below.

5)Layer Palette - Select Top Layer.
6)Layers - Merge - Merge Down.
7)Effects - Plugins - Eye Candy 5 Nature - Rust - Settings Tab: Select Large, Dark Brown, High Coverage. Default Settings.
J)Finishing Touches
1)Layer Palette - Turn on Visability of Main Tube Layer. Select.
2)Layers - Arrange - Bring to Top.
3)Effects - Plugins - Eye Candy 5 Impact -Perspective Shadow - Settings Tab: Select psppeg_ps_at1
J)Framing
1)Layers - Merge - Merge All
2)Image - Add Borders - 2 pixels symmetric border - Black #000000.
3)Image - Add Borders - 50 pixels symmetric border - White #ffffff.
4)Magic Wand Tool - Same Settings - Select the White Border
5)Material Palette - Foreground Color #ac1f04 - Select Gradient. Fading Foreground Gradient - Same Settings as before.
6)Flood Fill with Gradient.
7)Selections - Select None.
8)Image - Add Borders - 2 pixels symmetric border - Black #000000.
9)Maximize element2_psppeg_apple.psp - Edit - Copy - Close Tube - Edit - Paste - Paste As a New Layer.
10)Mover Tool - Move the tube down so the bottom lines up.
11)Effects - Edge Effects - Enhance.
12)Layer Palette - Blend Mode: Normal, Opacity: 80.
14)Layers - Merge - Merge All.
K)Finalizing
1)Add your watermark
2)Add text
3)Layers - Merge - Merge All Flatten.
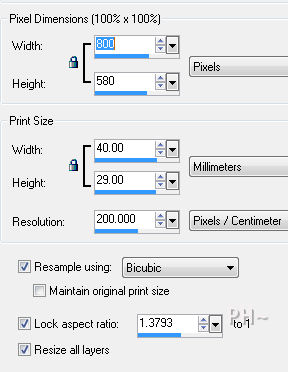
4)Image - Resize 800 pixels.

Your done.
Another Example

Home
©PSPPEG 2011
All Rights Reserved
