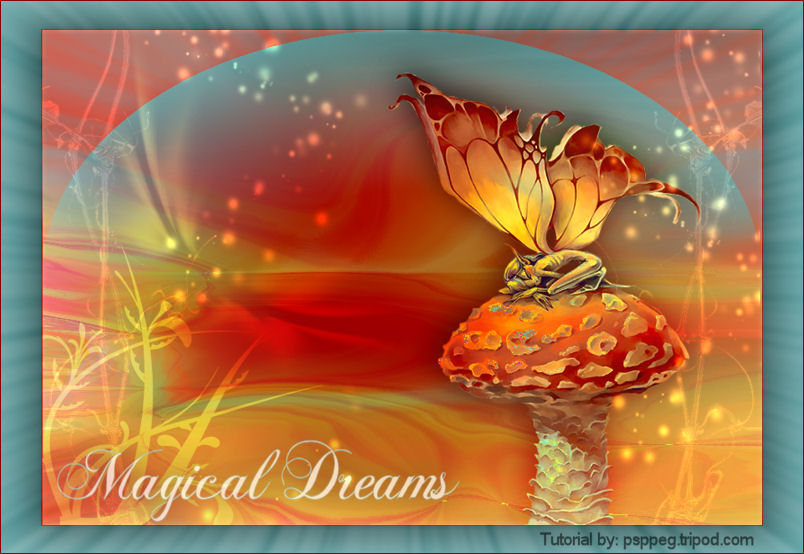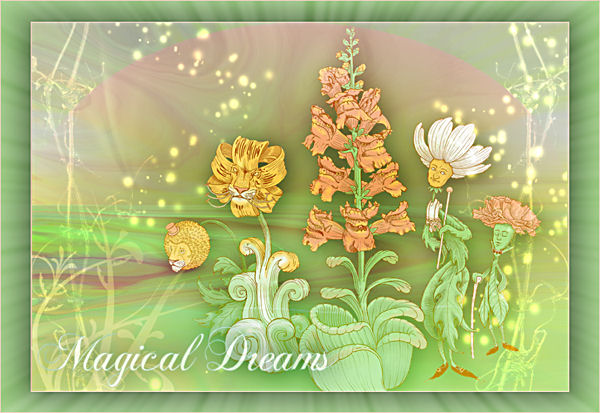
Magical Dreams
This tutorial is another play on color, as is the Tutorial Beautiful Day
Filters Required:
Eye Candy 5 Impact - Backlighting
Filter Factory M - Change RGB Percentages
Filter Factory S - Strange Life Forms 4
Filter Factory R - Solar Inverter Hiliter
If you need a filter..select the linked image below and scroll down the page.

------------------------
Tubes Required:
Main Tube by Kikirou
elements
nature tubes
The Tube's artist is ©Anna Ignatieva and the tube was provided by kikirou with permission.
You can find kikirou's group below. The tubes are beautiful!

Many Thanks Kikirou!
------------------------
Materials
------------------------
|
Preparation:
Look thru the list of filters and make certain you have them.
Double Click the Eye Candy Preset. This places them into your program.
Open all tubes in your psp program and minimize.
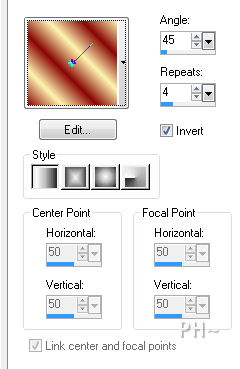
Material Palette - Set foreground to #fff5b1. Set Foreground to Gradient - Style Linear, Gradient Foreground/Background, Angle 45, Repeats 4, Invert checked.

Lets Begin:
A)Background
1)File, New Image, 800wx550h, transparent.
2)Flood Fill with gradient - Adjust - Blur - Gaussian Blur 50.00
3)Maximize your Main tube - kikirou1013_anna_ignatieva_sleeping_butterfly.psp - Edit - Copy - Edit - Paste As a New Layer
4)Maximize your Main tube - kikirou1000b_butterfly.psp - Edit - Copy - Edit - Paste As a New Layer - Position beside first tube
5)Layers - Merge - Merge Down
6)Layers - Merge - Merge Visable
7)Adjust - Blur - Radial Blur

B)Background 2
1)Layers - Duplicate
2)Effects - Plugins - Filter Factory S - Strange Life Form No. 4.
3)Effects - Plugins - Filter Factory M - Change RGB Percentages

C)Elements Part One
1)Layers - Duplicate
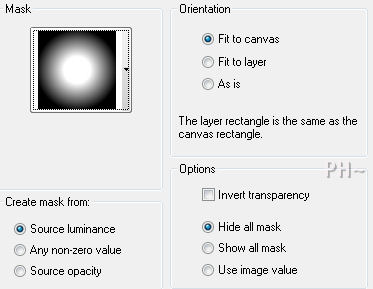
2)Layers - Load/Save Mask - Load Mask From Disk - Select Mask 2020

3)Layers - Merge - Merge Group
D)Elements Part Two
1)Effects - Plugins - Filter Factory R - Solar Inverter_Hiliter _Default Settings
2)Layers - New Raster Layer
3)Selection Tool - Custom Selection - Left 0, Top 0, Right 200, Bottom 550.
4)Flood Fill with #56a6a7 or a Harmonious Color, meaning a color opposite on the color wheel
Colors Opposite: orange - blue, yellow - purple, green - red or pink.
5)Selections - Select None .
6)Adjust - Blur - Gaussian Blur - Same Setting.
7)Layers - Duplicate
8)Image - Mirror
9)Layers - Merge - Merge Down
10)Effects - Distortion Effects - Punch - Strength 100%.
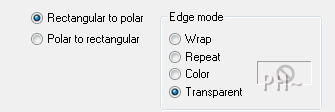
11)Effects - Distortion Effects - Polar Co-ordinates

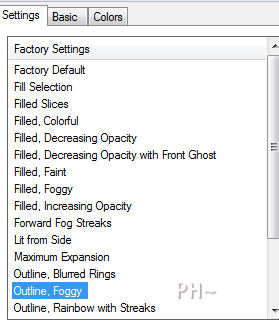
12)Effects - Plugins - Eye Candy 5 Impact - Backlighting - Settings Tab: Select Outline, Foggy.

13)Layer Palette - Blend Mode: Color.
14)Layer Palette - Select Middle Layer
15)Layers - Arrange - Bring to Top
16)Layer Palette - Select Top Layer
E)Element Layer 1
1)Maximize element1_psppegmd.psp - Edit - Copy - Edit - Paste - As a New Layer
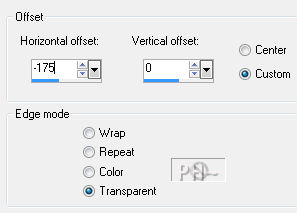
2)Effects - Image Effects - Offset - minus 175, 0, transparent.

F)Element Layer 2
1)Maximize element2_psppegmd.psp - Edit - Copy - Edit - Paste - As a New Layer
2)Effects - Image Effects - Offset - 50, 0, transparent.
3)Layer Palette - Blend Mode: Dodge, Opacity: 70.
G)Nature Tube
1)Maximize kikirou1000b_butterfly -Edit - Copy - Edit _ Paste - As a New Layer
2)Image - Resize - 80%, All Layers Unchecked
3)Mover Tool - Position to the far left
4)Layer Palette - Blend Mode: Dodge, Opacity: 70.
5)Layers - Duplicate
6)Image - Mirror
H)Main Tube
1)Maximize - kikirou1013_anna_ignatieva_sleeping_butterfly.psp - Edit - Copy - Edit - Paste - As a New Layer
2)Mover Tool - Position - Down and to the Right
3)Layer Palette - Blend Mode: Overlay.
4)Effects - 3D Effects - Drop Shadow - 5, 6, 50, 50, black #000000.
4)Layers - Duplicate
5)Layer Palette - Blend Mode: Color, Opacity: 55
J)Framing
1)Layers - Merge - Merge All
2)Image - Add Borders - 1 pixels symmetric border - Background Color #890604.
3)Layers - Promote Background Layer
4)Image - Resize 90%, all layers unchecked.
5)Layers - New Raster Layer
6)Layers - Arrange - Send to Bottom
7)Flood Fill with #56a6a7 - The color you made the moon.
8)Layer Palette - Select Top Layer
9)Effects - Plugins - Backlight - Same Settings.
10)Effects - 3D Effects - Drop Shadow - Same Settings - Repeat with minus values.
11)Image - Add Borders - 1 pixel - same color.
K)Finalizing
1)Add your watermark
2)Maximize - text_psppegmd.psp - Edit - Copy - Edit - Paste As a New Layer
3)Mover Tool - Position Bottom Left Corner of Image
4)Layer Palette - Opacity: 70.
5)Effects - 3D Effects - Drop Shadow - Same Settings - Except 5, 6, 50, 50.
6)Layers - Merge - Merge All Flatten.
Your done.
Another Example

Home
©PSPPEG 2011
All Rights Reserved
