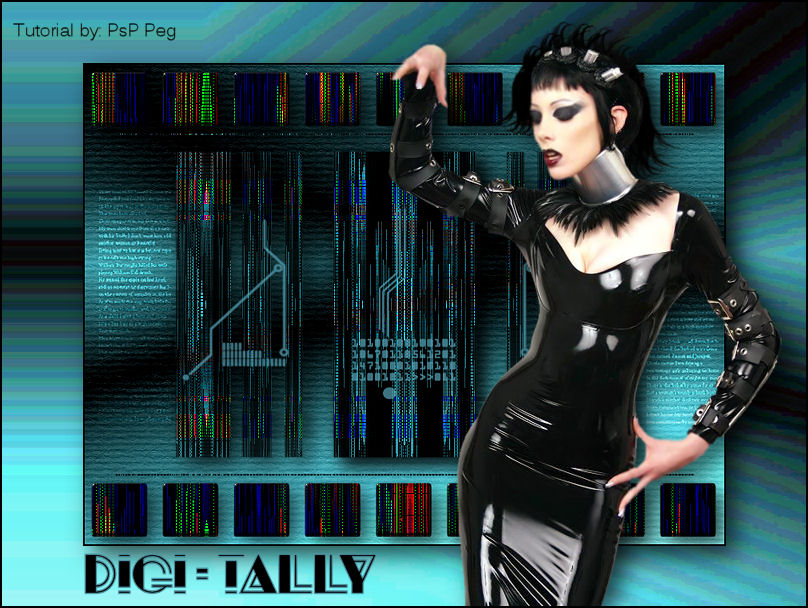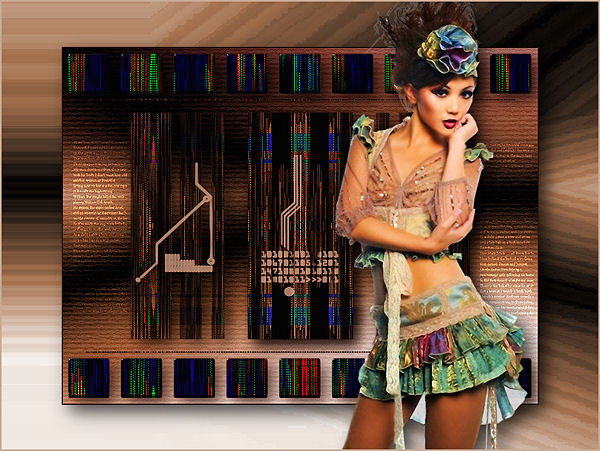
Digitally
Filters Required:
Filters Unlimited 2.0 - Paper Textures
Eye Candy 5 - Impact
Simple
Cybia - Edge Works
If you need a filter..select the linked image below and scroll down the page.

------------------------
Tubes Required:
Main Tube by Luz Cristina
Luz Cristina has provided psppeg with permission to use the tube provided in this tutorial.
To view more Fantastic Tubes by the Tuber Luz Cristina click image below.

Many Thanks Cristina
------------------------
Materials
------------------------
|
Preparation:
Look thru the list of filters and make certain you have them.
Open tubes, and mask in your psp program and minimize.
Place Selection files in your Psp Selection Folder
Lets Begin:
A)Background
1)File, New Image, 800wx600h, transparent.
2)Selections - Select All
3)Maximize - digi_psppeg_bkg1.jpg - Edit - Copy - Minimize - Edit - Paste - Paste Into Selection
4)Selections - Select None
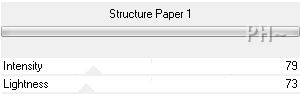
5)Effects - Plugins - Filters Unlimited 2.0 - Paper Textures - Structure Paper1

B)Elements
1)Layer - New Raster Layer
2)Selections - Select All
3)Maximize - digi_psppeg_bkg2.jpg - Edit - Copy - Close jpg - Edit - Paste - Paste Into Selection
4)Layers Duplicate
5)Layer Palette - Turn off Visability of top layer - Select Middle Layer
6)Selections - Load Selection - Load Selection From Disk - Select psppeg_digi1.sel
7)Selections - Invert - Hit Delete Key on Keyboard
8)Selections - Select None
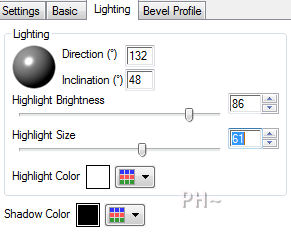
9)Effects - Plugins - Eye Candy 5 Impact - Bevel - Settings Tab: Select Concave Edge, Exaggerated - Then Adjust lighting as follows

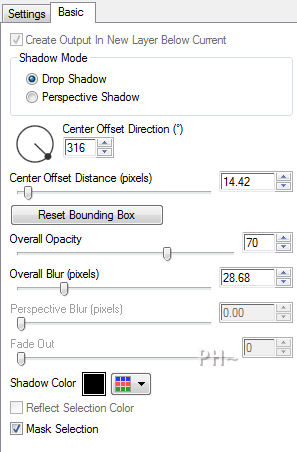
Effects - Plugins - Eye Candy 5 Impact - Perspective Shadow - Settings Tab: Drop Shadow Blurry - Basic Tab: Lower Overall Opacity to 70

C)Mask Layer
1)Layer Palette - Turn visibility of top layer back on, select layer
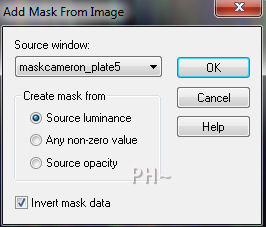
2)Layers - New Mask Layer - From Image - Select maskcameron_plate5 - Invert Checked

3)Layers - Merge - Merge Group
4)Effects - Plugins - Simple - Top Left Mirror
5)Layer Palette - Blend Mode: Luminance
6)Effects - Eye Candy 5 Impact - Perspective Shadow - Same Settings
7)Selections - Load Selection - Load Selection From Disk - Select: psppeg_dg2.sel
8)Selections - Promote Selection to Layer
9)Layer Palette - Opacity: 80
D)Accent Tube 1
1)Maximize psppeg_element1.psp - Edit - Copy - Close image - Edit - Paste As a New Layer.
E)Accent Tube 2
1)Selections - Load Selections - Load Selections From Disk - Select: psppeg_dg3.sel
2)Layers - New Raster Layer, Flood Fill with #5099ab
(For Small areas I select a flat brush such as the default brush and then just go over the selection until filled)
3)Selections - Select None
Layer Palette - Opacity: 75
F)Framing One
1)Image Add Borders - 2 pixel symmetric border in #000000 black
2)Layers - Promote Background to Layer
3)Image - Resize - 80%, all layers unchecked
4)Adjust - Sharpen - Sharpen
5)Layers - New Raster Layer
6)Layers - Arrange - Send to Bottom
7)Selections - Select All
8)Maximize digi_psppeg_bkg1.jpg - Edit - Copy - Edit - Paste Into Selection
9)Image - Mirror
10)Selections - Select None
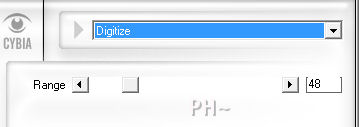
11)Effects - Plugins - Cybia - Edge Works - Digitize

12)Layer Palette - Select Top Layer
13)Effects - Plugins - Eye Candy 5 Impact - Perspective Shadow - Same Settings
E)Main Tube
1)Maximize 2948-luzcristina.psp - Edit - Copy - Close image - Edit - Paste As a New Layer.
2)Image - Resize - 85%, all layers unchecked.
3)Effects - Plugins - Eye Candy 5 Impact - Prospective Shadow - Same Settings
4)Mover Tool - Position to the Right
5)Layers - Merge - Merge All
K)Finalizing
1)Add your watermark
2)Add text
3)Layers - Merge - Merge All Flatten.
4)Image - Add Borders - Add a 2 pixel symmetric border in black #000000
Your done.
Another Example

Home
©PSPPEG 2011
All Rights Reserved
