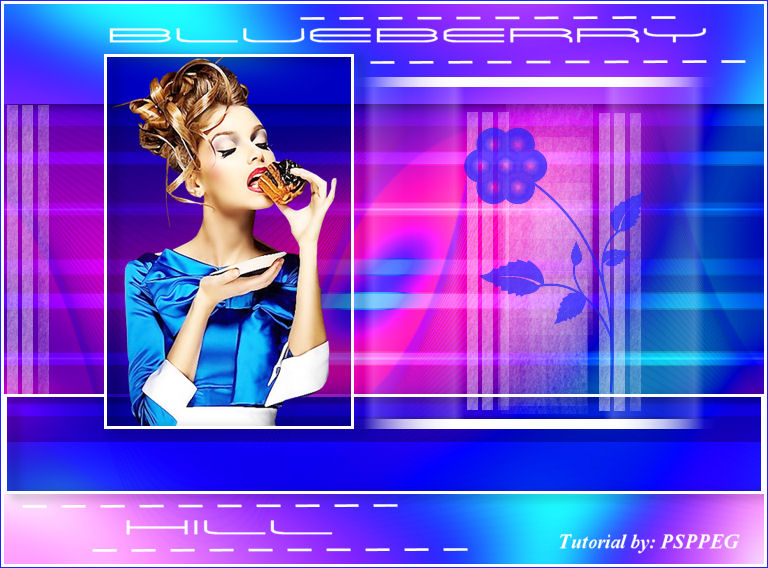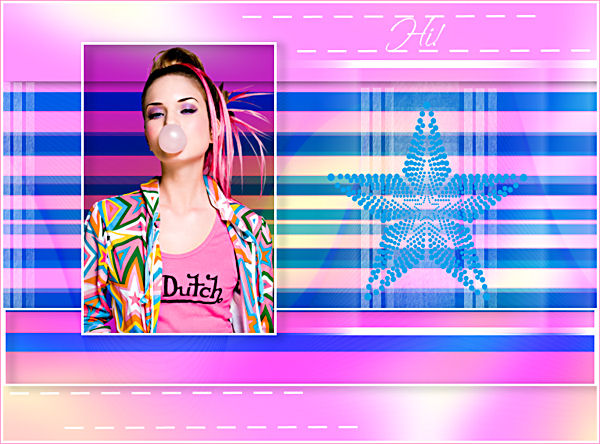
Blue Berry Hill
No Filters Required
------------------------
Tubes Required:
Main Tube by Claudia Viza
Other Elements by Psppeg
Claudia has provided psppeg with permission to use the tube provided in this tutorial.
To view more Fantastic Tubes by her click image below.

Many Thanks Claudia
------------------------
Materials
------------------------
|
Preparation:
Open all tubes in your psp program and minimize.
Lets Begin:
A)Background
1)File, New Image, 760wx560h, transparent.
2)Selections - Select All
3)Maximize - bb_texture_pp.jpg - Edit - Copy - Edit - Paste - Into Selection
4)Selections - Select None
5)Layers - New Raster Layer
6)Flood Fill with #1d24ff
7)Layer Palette - Blend Mode: Screen
8)Layers - Merge - Merge Visable
B)Background Lines
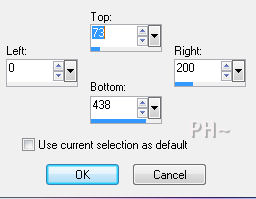
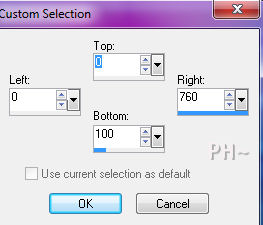
1)Selection Tool - Custom Selection

2)Layers, New Raster Layer -Flood Fill with #1d24ff
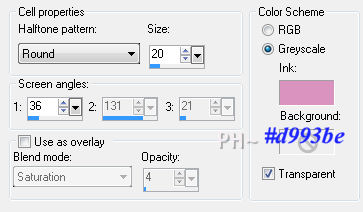
3)Effects - Artistic Effects - Half Tone

4)Selections - Select None
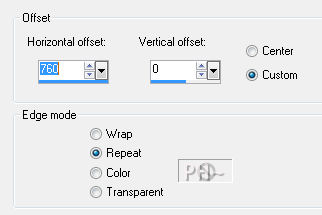
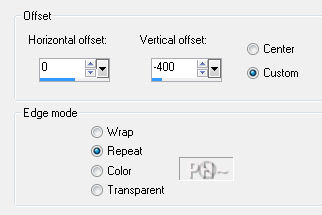
5)Effects - Image Effects - Offset

6)Effects - Edge Effects - Dilate, Repeat
7)Layer Palette - Blend Mode: Multiply
8)Layers - Duplicate
9)Image - Flip
10)Layer Palette - Opacity: 65
C)Background Elements 1
1)Maximize blueberryhill_element1_pp.psp - Edit - Copy - Close Tube - Edit - Paste - Paste As a New Layer
2)Effects - Image Effects - Offset - Horizontal 200, Vertical 0, transparent.
3)Layers - Duplicate
4)Image - Mirror, Image - Flip
5)Layers - Merge - Merge Down
6)Layer Palette - Soft Light
D)Background Adjustment
1)Layer Palette - Select Bottom Layer
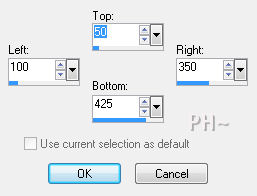
2)Selection Tool - Custom Selection

3)Selections - Promote Selection to Layer
4)Select None
5)Effects - Image Effects - Offset

6)Layer Palette - Blend Mode: Saturation
7)Layers - Arrange - Bring to Top
D)Background Adjustment 2
1)Layer Palette - Select Bottom Layer
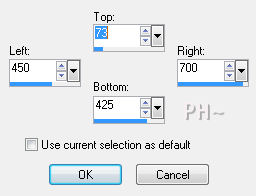
2)Selection Tool - Custom Selection

3)Selections - Promote Selection to Layer
4)Select None
5)Layers - Arrange - Bring to Top
6)Layers - Duplicate
7)Effects - 3D Effects - Drop Shadow - 3, 9, 50, 15.00, black
8)Layer Palette - Select Layer below
9)Image - Flip
10)Effects - Image Effects - Offset - Horizontal 0, Vertical 70, transparent
11)Layer Palette - Blend Mode: Multiply
12)Selections - Select All, Selections - Float
13)Selections - Modify - Select Selection Borders - Inside, Borderwidth 3
14)Layers - New Raster Layer
15)Flood Fill White
16)Selections - Select None
17)Effects - 3D Effects - Drop Shadow - Same Settings
E)Main Tube and Frame
1)Layer Palette - Select Bottom Layer
2)Selection Tool - Custom Selection

3)Selections - Promote Selection to Layer (Keep Selected Until till informed otherwise)
4)Layers - Arrange - Bring to Top
5)Layer Palette - Blend Mode: Multiply
6)Layers - Duplicate
7)Adjust - Brightness and Contrast

8)Maximize tubeclaudiaviza-mujer2241.psp - Edit - Copy - Close image - Edit - Paste As a New Layer.
9)Image - Resize - 70%, all layers unchecked.
10)Move Tool - Position tube inside selection
11)Selections - Invert, Hit Delete Key
12)Selection - Invert
13)Layers - New Raster Layer
14)Selections - Modify - Select Selection Borders - Same Settings
15)Flood Fill White
16)Effects - 3D Effects - Drop Shadow - Same Settings
17)Selections - Select None
F)Accents 1
1)Layers - New Raster Layer
2)Selection Tool - Custom Selections

3)Flood Fill White
4)Selection - Modify - Contract - 10 pixels - Hit Delete Key
3)Selections - Select None
4)Distortion Effects - Wind - From Right, Strength 100
5)Layers - Duplicate
6)Effects - Image Effects - Offset - Horizontal 300, Vertical 0, transparent
7)Maximize blueberryhill_element2_pp.psp - Edit - Copy - Close image - Edit - Paste As a New Layer.
8)Effects - Image Effects - Offset - Horizontal minus 65, Vertical 25, transparent
9)Selection Tool - Rectangle - Mode: Add, Feather 0 - Make a Selection of bottom of left squares

10)Hit your Delete Key
G)Accents 2
1)Layers - New Raster Layer
2)Select the brush starwalt_floralvectorbrush_4 - size 264
3)Paint the flower with #1d24ff and place to the right centered
4)Maximize blueberryhill_element3_pp.psp - Edit - Copy - Close image - Edit - Paste As a New Layer.
3)Mover Tool - Position top Right Corner
4)Layers - Duplicate
5)Image - Mirror, Image - Flip
6)Place Title Between the lines
J)Framing
1)Layers - Merge - Merge All - Edit - Copy
2)Image - Add Borders - 3 pixels symmetric border - with White.
3)Image - Add Borders - 1 pixels symmetric border - with #1d24ff.
K)Finalizing
1)Add your watermark
2)Add text
3)Layers - Merge - Merge All Flatten.
Your done.
Another Example

Home
©PSPPEG 2011
All Rights Reserved
