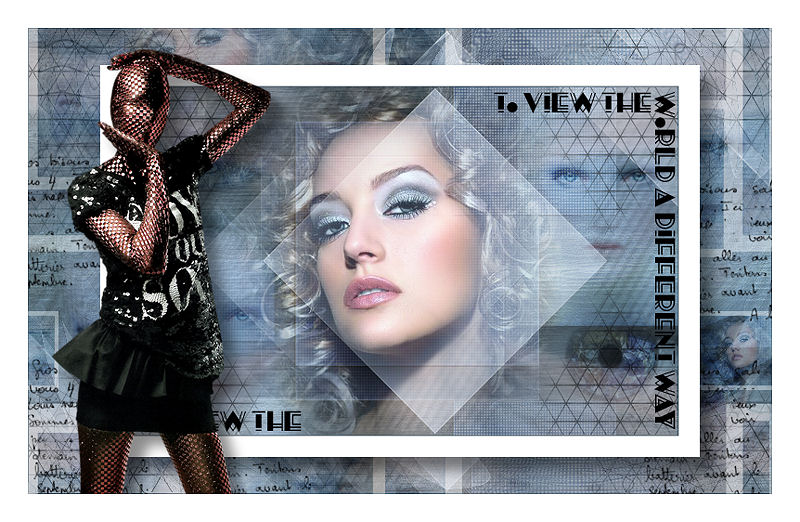
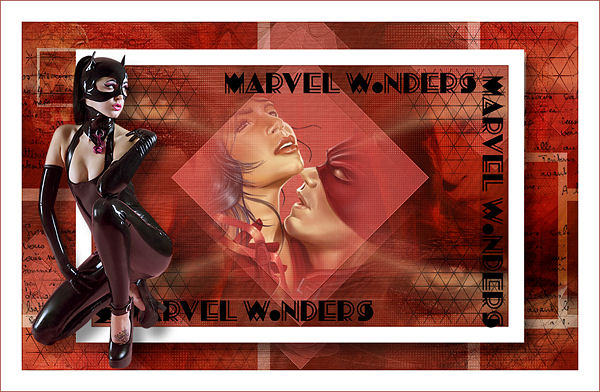
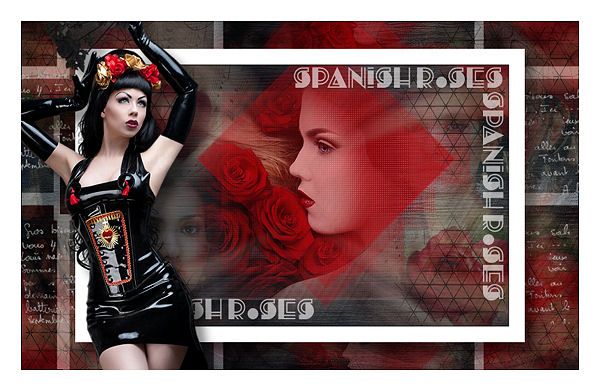
View the World
Note: Your results could be slightly different, as it should be.
Filters Required:
Mura Meisters Copies
Simple
------------------------
Tubes Required:
*2 faces misted
*1 eye tube
*1 female full or partial body
*3 patterns
*1 selection
*3 elements
* Your PSP Program
All is provided Unless you would like to choose your own tubes
-------------------------
Main Tube by LexHa
1 Face tube by Yoka
1 Face tube by Devils
1 eye tube by Ivo
Psppeg has been given permission to use the tubes provided in this tutorial.
To view more Fantastic Tubes click image below.

Many Thanks!
------------------------
Materials
------------------------
|
Preparation:
Look thru the list of filters and make certain you have them
Place Selection in your Selection Folder
Open all tubes in your psp program and minimize
Open all patterns in your PSP Program and minimize
----------------------------
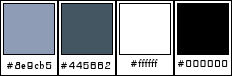
Colours
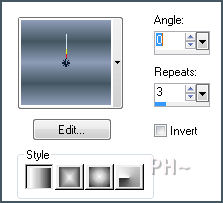
Material Palette - Set foreground to #8e9cb5 and background to #445662 or select a medium and dark color to work with. Set Foreground to Gradient - Style Linear, Gradient Foreground/Background, Angle 0, Repeats 3, Invert unchecked.
Lets Begin:
A)Background
1)File, New Image, 800 w x 500 h, transparent.
2)Flood Fill with Gradient.
3)Selections - Select All
4)Maximize Devilsinside_115_2009.psp or your main face - Edit - Copy - Minimize - Edit Paste - Into Selection
5)Selections - Select None
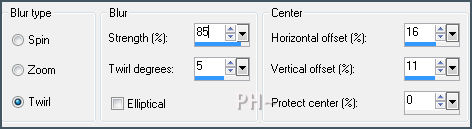
6)Adjust - Blur - Radial Blur
7)Layers - New Raster Layer
8)Layers - Arrange - Send to Bottom
9)Flood Fill with Background Colour
10)Layer Palette - Select Top Layer - Blend Mode: Luminance Legacy
11)Layers - Merge - Merge Visable
12)Layers - New Raster Layer
13)Material Palette - Left Click on Background Colour - Select Texture - Change texture to Woodgrain - provided by Coral
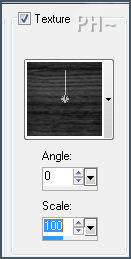
14)Flood Fill with Background Texture, Repeat Flood Fill
15)Layers - Merge - Merge Visable
16)Effects - Edge Effects - Enhance
B)Background Effects
1)Maximize psppeg_pattern1.jpg - Edit - Copy - Close - Edit - Paste - As a New Layer
2)Image - Resize - 80%, all layers unchecked
3)Layer Palette - Blend Mode: Luminance Legacy, Opacity: 50
4)Effects - Distortion Effects - Wind - From the Right, 100%
4)Maximize Devilsinside_115_2009.psp or your main face - Edit - Copy - Close - Edit Paste - As a New Layer
5)Maximize Yoka-Misted-face-23052012.psp or your second face - Edit - Copy - Close - Edit Paste - As a New Layer
6)Image - Resize - 70%, all layers unchecked
7)Effects - Image Effects - Offset - Horizontal minus 270, Vertical minus 170, transparent
8)Layer Palette - Blend Mode: Overlay, Opacity: 65
9)Layers - Duplicate
10)Effects - Image Effects - Offset - Horizontal 570, Vertical 200, transparent
11)Maximize IvoChile109.psp or your eye tube - Edit - Copy - Close - Edit Paste - As a New Layer
12)Image - Resize 50%, all layers unchecked
13)Layer Palette - Soft Light
14)Mover Tool - Position top left corner
14)Layers - Duplicate
15)Image - Mirror
16)Mover Tool - Position Bottom Right Corner
17)Layer Palette - Blend Mode: Overlay, Opacity: 75
C)Background Effects 2
1)Maximize psppeg_pattern2.jpg - Edit - Copy - Close - Edit - Paste - As a New Layer
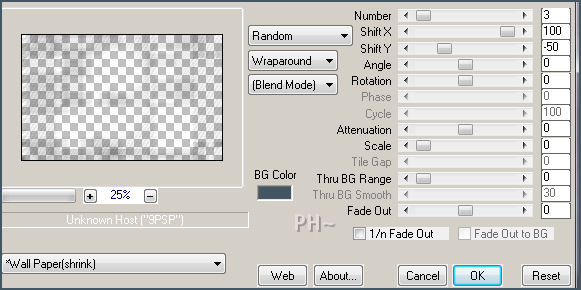
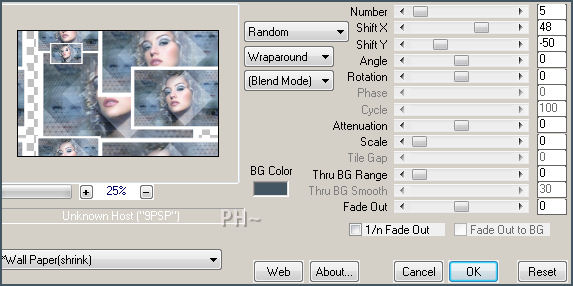
2)Effects - Plugins - Mura Meisters Copies
3)Effects - Plugins - Simple - Zoom Out and Flip
4)Adjust - Blur - Motion Blur - Angle: 45, Strength: 50.00
D)Overlays
1)Layers - New Raster Layer
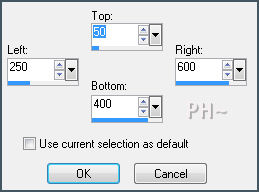
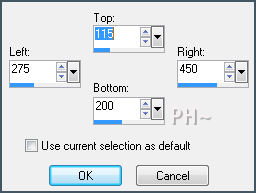
2)Selections Tool - Custom Selection
3)Flood Fill Foreground Colour
4)Selections - Select None
5)Layer Palette - Blend Mode: Screen
6)Image - Free Rotate - 45% to the Left, all layers unchecked
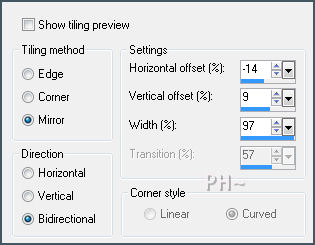
7)Effects - Image Effects - Seamless Tiling
8)Effects - Image Effects - Offset - Horizontal: 50, Vertical: minus 35, transparent
9)Effects - Edge Effects - Enhance
10)Layer Palette - Opacity: 60
11)Layers - Duplicate
12)Effects - Image Effects - Offset - Horizontal: 375, Vertical: 300, transparent
13)Layers - Duplicate - Image - Mirror - Flip
14)Layers - New Raster Layer
15)Selections Tool - Custom Selection - Same Settings
16)Flood Fill with Foreground Colour
17)Selections - Select None
18)Effects - Image Effects - Seamless Tiling - Same Settings
19)Effects - Texture Effects - Weave
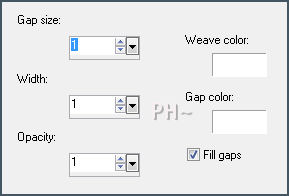
20)Effects - Plugins - Mura Meisters - Copies - Same Settings
21)Layer Palette - Blend Mode: Soft Light
22)Layer Palette - Select 3rd Layer From Bottom (the Main Face)
23)Selections - Load/Save Selection - Load: psppeg_faces1.sel
24)Selections - Promote Selection to Layer
25)Layers - Arrange - Bring to Top
26)Layer Palette - Opacity: 60
27)Selections - Select None
E)Corners
1)Selections Tool - Custom Selection
2)Selections - Promote Selection to Layer
3)Selections - Select None
4)Mover Tool - Position Top Left Corner
5)Adjust - Blur - Radial Blur - Same Settings
6)Maximize - element1_view_psppeg.psp - Edit - Copy - Close - Edit - Paste - As a New Layer
7)Mover Tool - Position over the blur you created - Top Left Corner
8)Layers - Merge - Merge Down
9)Effects - Plugins - Simple - Top Left Mirror
J)Framing
1)Layers - Merge - Merge All
2)Image - Add Borders - 1 pixels symmetric border - with background colour
3)Image - Add Borders - 30 pixels symmetric border - White #ffffff
4)Layers - Promote Background to Layer
5)Layers - Duplicate
6)Image - Resize 75%, all layers unchecked
7)Layer Palette - Select Bottom Layer
8)Selections - Select All - Select - Modify - Contract 30%
9)Image - Crop to Selection
10)Layers - Duplicate
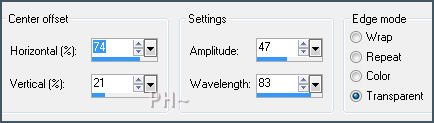
11)Effects - Distortion Effects - Ripple
12)Layer Palette - Opacity: 50
13)Layer Palette - Select Top Layer
14)Layers - Duplicate
15)Effects - Plugins - Mura Meisters - Copies
16)Layers - Arrange - Move Down
17)Layer Palette - Blend Mode: Soft Light
18)Maximize element1_psppegview.psp - Edit - Copy - Close - Edit - Paste As a New Layer
19)Layer Palette - Select Top Layer
20)Effects - 3D Effects - Drop Shadow - 14, 14, 45, 20.00, black
21)Maximize text_psppegview.psp - Edit - Copy - Close - Edit - Paste As a New Layer
22)Maximize LexHa_StrangeLook_May 2012.psp - Edit - Copy - Close - Edit - Paste As a New Layer
23)Image - Resize - 75%, all layers unchecked
24)Mover Tool - Position to the Left
25)Effects - 3D Effects - Drop Shadow - Same Settings
26)Layers - Merge All
27)Image - Add Borders - 30 pixels symmetric border - White #ffffff
K)Finalizing
1)Add your watermark
2)Add text
3)Layers - Merge - Merge All Flatten.
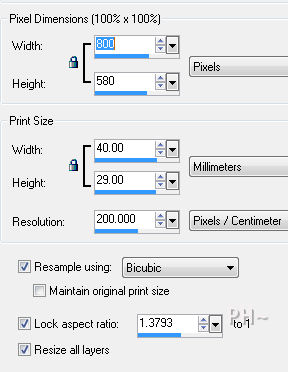
4)Image - Resize 800 pixels.
Your done.
Another Example
Home
©PSPPEG 2011 - 2012
All Rights Reserved
Tutorial Created May 30th 2012