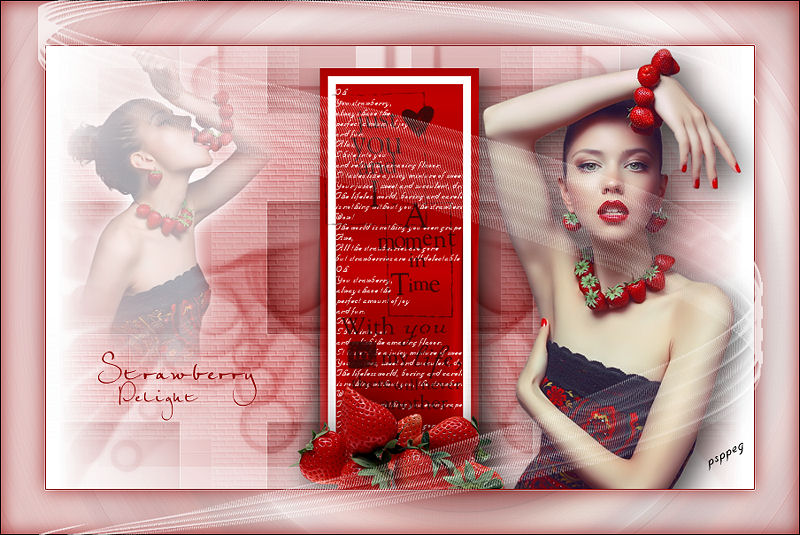
Strawberry Delight
This is a limited colour tutorial.
Filters Required:
Simple
VM Toolbox
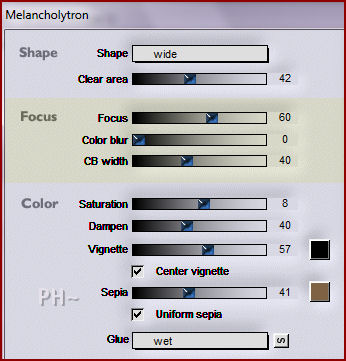
Flaming Pear - Melancholytron
If you need a filter..select the linked image below.
Filters
------------------------
Tubes Required:
Main Tubes by Guismo
Other Tube by Ivo
PSP Peg has been given permission to use the tubes provided in this tutorial.
To view more Fantastic Tubes by these tubers click image below.

Many Thanks!
------------------------
Materials
------------------------
|
Preparation:
Look thru the list of filters and make certain you have them.
Open all tubes and mask in your psp program and minimize.
------------------------
Colours
Material Palette - Set foreground to #8f0000 and background to #ffffff or select a medium color and light colour to work with.
Lets Begin:
A)Background
1)File, New Image, 800 w x 550 h, transparent.
2)Flood Fill: Background Colour
3)Layers - New Raster Layer
4)Flood Fill: Foreground Colour
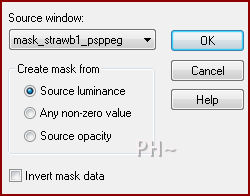
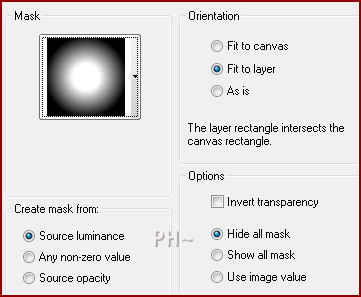
5)Layers - New Mask Layer - From Image - Mask: mask_strawb1_psppeg.jpg
6)Layers - Merge - Merge Group
7)Layers - Duplicate
8)Image - Resize - 75%, all layers unchecked
9)Repeat Step 7) and 8) above - When done you should have 4 layers
10)Layers - Merge - Merge Visable
B)Background Elements
1)Layers - Duplicate
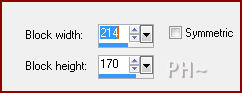
2)Effects - Distortion Effects - Pixelate
3)Magic Wand Tool - Feather and Tolerance 0 - Select the darkest colors, which are at the bottom of your image

4)Eye Dropper Tool - Select the top center square of your pixelated image
5)Flood Fill: Your New Colour
6)Selections - Select All - Select Modify - Contract: 100 pixels
7)Hit your delete key
8)Selections - Select none
9)Effects - Plugins - Simple - Zoom Out and Flip
10)Effects - Plugins - Simple - Top Left Mirror
11)Effects - Edge Effects - Enhance More
12)Layer Palette - Blend Mode: Soft Light
12)Layers - Duplicate
13)Effects - Plugins - Toadies - What Are You?

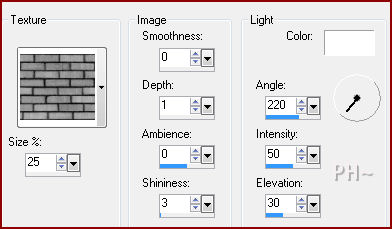
14)Effects - Texture Effects - Texture - Bricks
15)Adjust - Sharpen - Sharpen
16)Layer Palette - Activate Middle Layer
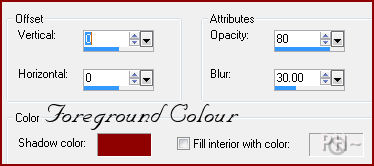
17)Effects - 3D Effects - Drop Shadow - 10, 10, 70, 50, black
C)Background Changes
1)Layer Palette - Activate Bottom Layer
2)Image - Free Rotate - Right 90.00 degrees, all layers unchecked
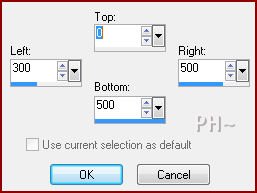
3)Effects - Image Effects - Offset - Horizontal: minus 200, Vertical: 0, transparent
4)Layers - Duplicate
5)Image - Mirror
6)Layers - Merge - Merge Down
7)Effects - Plugins - VM Toolbox - Softborder
8)Layers - Duplicate
9)Layer Palette - Blend Mode: Multiply, Opacity: 60
10)Layers - Merge - Merge Visable
D)Accent Tube 1
1)Maximize calguisstrawberrypassionFlexF107032012.psp
2)Layer Palette - Select Top Layer - Right Click Mouse - Select Delete
3)Layers - Load/Save Mask - Load Mask: 20/20
4)Layers - Merge - Merge Group
5)Image - Mirror
6)Edit - Copy - Close - Edit - Paste - As a New Layer
7)Image - Resize 50%, all layers unchecked
8)Mover Tool - Position: Top Left Corner
9)Selections - Select All - Select Float - Select Defloat
10)Selections - Modify - Feather # of pixels 25
11)Layer Palette - Select Bottom Layer
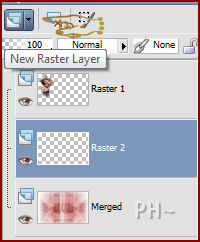
12)Layer Palette - Holding Shift Key - Hit New Raster Button - Create a New Raster Layer
13)Flood Fill Selection: Background Colour
14)Selections - Select None
15)Layer Palette - Select Top Layer - Opacity: 35
E)Wording and Strawberries
1)Layers - New Raster Layer
2)Selections Tool - Custom Selection
3)Change Foreground Back to #8f0000 (Your Medium Colour)
4)Flood Fill: Foreground Colour
5)Selections - Modify - Contract 10 pixels
6)Flood Fill: Background Colour
7)Selections - Modify - Contract 10 pixels
8)Flood Fill: Foreground Colour
9)Selections - Select None
10)Effects - Plugins - Flaming Pear - Melancholytron
11)Image - Resize - 90%, all layers unchecked
12)Layers - New Raster Layer
13)Paint Brush Tool - Select Brush Tip sd_text_pp
14)Material Palette - Switch Colours making white foreground colour
15)Stamp one time in the center of your Center Panel
16)Layer Palette - Opacity: 80
17)Maximize text13sm.psp Select Raster 3 - Edit - Copy - Minimize - Edit Paste - Position on your center panel
18)Mover Tool - Position where desired
19)Repeat step 17) and 18) for Rasters 5 and 8 or select words of your desire
20)Maximize 201-Ivo-Frutillas.psp - Edit - Copy Layer Second from Top (The Strawberries) - Minimize Image
21)Edit - Paste - As a New Layer
22)Image - Resize 30%, all layers unchecked
23)Effects - 3D Effects - Drop Shadow - Same Settings
24)Position bottom of Center Panel
F)Main Tube
1)Maximize calguisstrawberrypassionFlexF07032012.psp - Edit - Copy - Close image - Edit - Paste As a New Layer.
2)Image - Resize 70%, all layers unchecked
3)Mover Tool - Position to the Right of the Center Panel
4)Effects - 3D Effects - Drop Shadow - Same Settings
G)Framing
1)Image - Add Borders - 1 pixels symmetric border - with #8f0000.
2)Image - Add Borders - 50 pixels symmetric border - with #ffffff.
3)Magic Wand Tool feather and tolerance 0, select white border
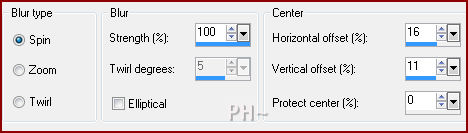
4)Adjust - Blur - Radial Blur
5)Effects - Edge Effects - Enhance
6)Effects - 3D Effects - Cutout
7)Image - Add Borders - 1 pixel symmetric border in #000000
H)Overlay
1)Maximize 201-Ivo-Frutillas.psp - Edit - Copy Layer Raster 2 - Close image - Edit - Paste As a New Layer.
2)Image - Resize 80%, all layers unchecked
3)Adjust - Brightness and Contrast - Contrast:0, Brightness: 255
J)Finalizing
1)Add your watermark
2)Add text (Text is included if desired)
3)Layers - Merge - Merge All Flatten.
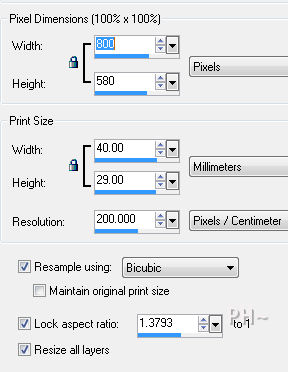
4)Image - Resize 800 pixels.
Your done.
Another Example

Home
©PSPPEG 2011 - 2012
Tutorial Created May 20th, 2012
All Rights Reserved