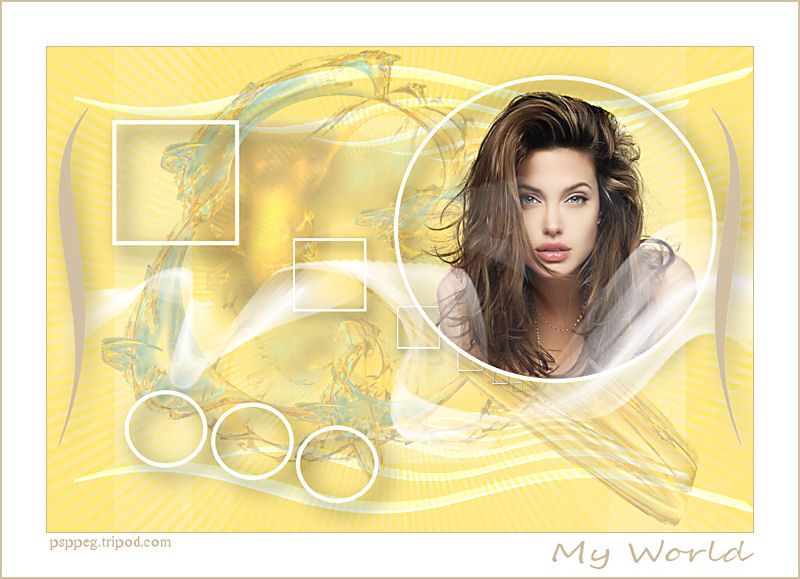
My World
Abstract ~ Shapes
This Tutorial Contains Mostly Feminine Lines with a Small Amount of Masculine Lines. What does this mean?
The answer is at the bottom of this tutorial.
Filters Required:
Eye Candy 5 Impact
Filters Unlimited - &Background Designers (included)
The Background Designer Filters must be imported to Filters Unlimited.
------------------------
Tubes Required:
Main Tube Female
abstract fractal
Selections and a Mask
I want to Thank the members of the group PSPResistire who provide tubes, masks plus everything psp related.
Its a great group to belong to.
Thanks to Danae and Narah and Grisi whom provided psp items which made this tutorial possible.
------------------------
Materials
------------------------
|
Preparation:
Place Selections in your PSP Selections file.
Open all tubes and mask in your psp program and minimize.
Open pp_colorswatch
With your eye drop tool select the yellow #ffe682 for foreground and white for background.

Lets Begin:
1)File, New Image, 800wx550h, transparent.
Flood fill #ffe682 yellow.
Materials Palette - Switch foreground to white, null the background.
Pen Tool - Settings to the right.
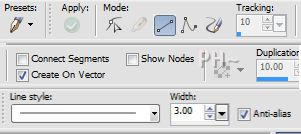
2)Starting at node x:0 and y:500 and ending at x:800 and y:500 place a vectored line of white.
(Node positions can be found bottom right of your psp.)

Layers Convert to Raster.
3)Effects - Distortion Effects - Wave

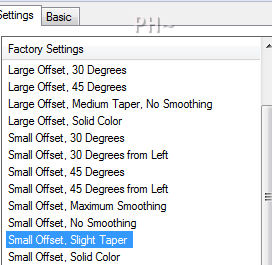
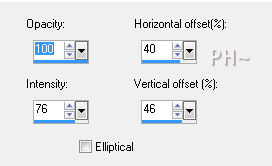
4)Effects - Plugins - Eye Candy 5 Impact - Extrude
Settings Tab Select Small Offset, Slight Taper.
Default Settings.
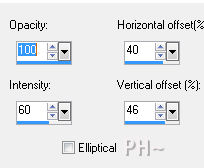
5)Effects - Reflection Effects - Feedback
Layer Palette - Change Blend Mode to Dodge, reduce opacity to 50.
Layers - Duplicate.
Image - Flip.
6)Layers - Duplicate.
Layer Palette - Change Blend mode to Normal and increase opacity to 100.
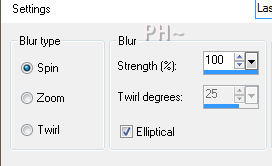
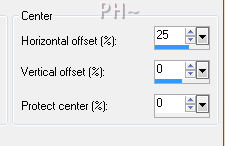
Adjust - Blur - Radial Blur
Effects - Plugins - Filters Unlimited - &background Designers IV - sf10 Sheer Curve - Default Settings.
Layers - Duplicate
Image - Flip
7)Layers - Merge - Merge Visable
Layers - New Raster Layer
Selection Tool - Selection - Custom Selection...

Flood fill white
Selections - Select None.
Effects - Plugins - Filters Unlimited - &bkg Designers sf10 IV - BlueBerry Pie - Default Settings.
Effects - Plugins - Filters Unlimited - &bkg Designers sf10 I - 4 Way Average - Default Settings.
Layer Palette - Change Blend Mode to Soft Light, lower opacity to 50.
Effects - Distortion Effects - Punch - Strength 50%
8)Maximize 0_5149f_55c5311d_XL - Edit - Copy - Close tube - Edit - Paste as a New Layer.
Image - Mirror
Layer Palette - Reduce Opacity to 33.
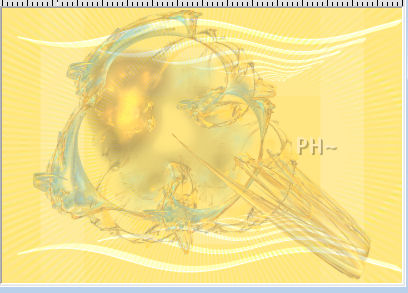
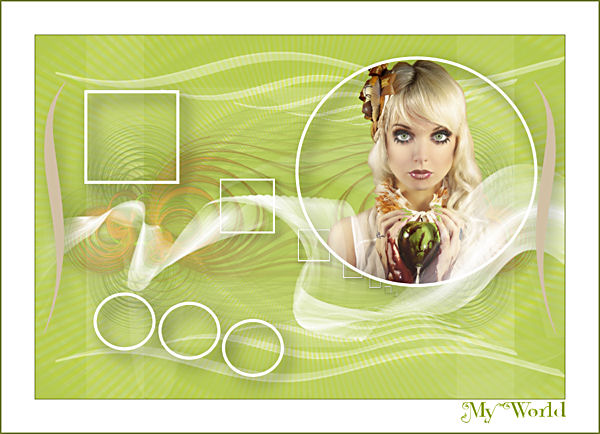
This is what you should have so far...
9)Layers - New Raster Layer.
Selections - Load/Save Selections - Load Selection From Disk - Load psppeg_mw.sel
Flood Fill white.
Selections - Select None.
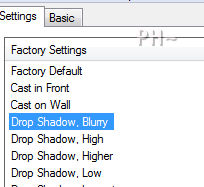
Effects - Plugins - Eye Candy 5 Impact - Perspective Shadow - Settings Tab -Drop Shadow, Blurry - Default Settings.
10)Layers - New Raster Layer
Selections - Load/Save Selections - Load Selection from Disk - Load psppeg_mwo.sel.
Flood Fill White
Selections - Select None.
Effects - Plugins - Eye Candy 5 Impact - Perspective Shadow - Same Settings.
Effects - Reflection Effects - Feedback...
11)Layers - New Raster Layer
Selections - Load/Save Selections - Load Selection from Disk - Load psppeg_mwor.sel.
Flood Fill White.
Selections - Select None.
Magic Wand Tool - Select Center of Circle
Selections - Modify - Expand 1 pixel.
Layer Palette - Select the layer below (Keep Selected)
Maximize Grisi_Woman_409.psp. Edit - Copy - Close tube - Edit - Paste as a New Layer.
Image - Resize - Resize 75%, all layers unchecked...
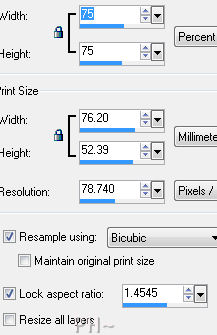
Position the tube within the circle
Selections - Invert - Hit Delete Key on Keyboard
Selections - Select None.
Layer Palette - Select Top Layer.
Effects - Plugins - Eye Candy 5 Impact - Perspective Shadow - Same Settings.
12) Layers - New Raster Layer.
Flood Fill Layer white.
Image - New Mask Layer - From Image...
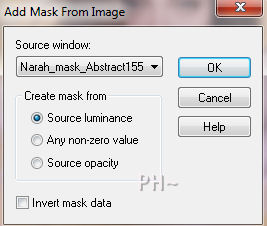
Layers - Merge - Merge Group.
Effects - Image Effects - Offset - Horizontal 0, Vertical minus -75, transparent.
Adjust - Sharpen - Sharpen.
13)Layers - New Raster Layer
Change foreground to #d2c0a5, the brown shade.
Selections - Load/Save Selections - Load Selection from Disk - Load psppeg_mworl.sel.
Flood Fill.
Selections - Select None.
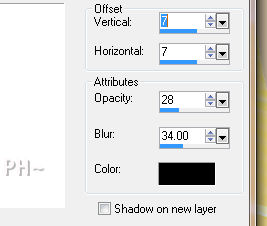
Effects - 3D Effects - Drop Shadow
Layers - Merge - Merge All Flatten.
Image - Add Borders - Add a 1 pixel Symmetric Border in your foreground color.
Image - Add Borders - Add a 50 pixel Symmetric Border in white.
Image - Add Borders - Add a 2 pixel Symmetric Border in your foreground color.
12)Add your watermark
Add text
Layers - Merge - Merge All Flatten.
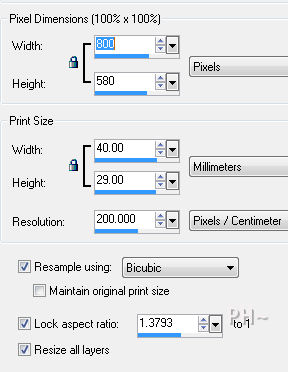
Image - Resize 800 pixels.
Your done.
The answer to the question what are feminine shapes versus masculine shapes is: Feminine Shapes
are either round, curving or S shaped and masculine lines are straight, cornered, or square.
Another Example
Home
©PSPPEG 2011
All Rights Reserved