Preparation:
Place Selections in PSP Selection Folder
Double click the Eye Candy 5 Preset
Open all tubes and masks in your psp program and minimize.
Change your foreground color to white, #ffffff, and background color to Black #000000.
Lets Begin:
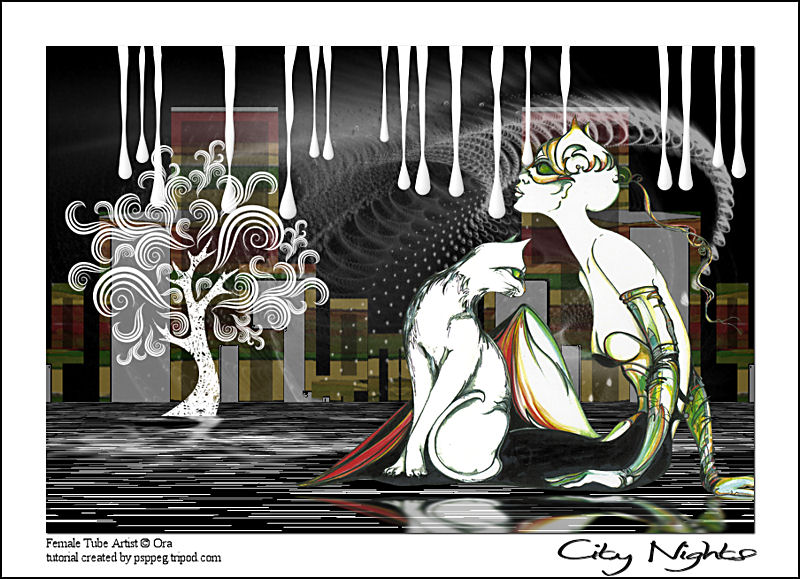
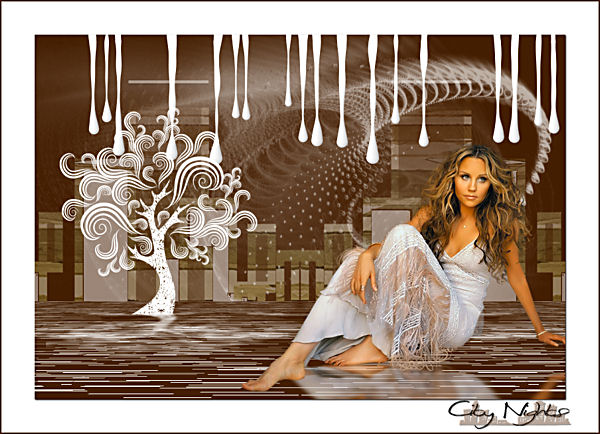
A) Background
1) File, New Image, 800wx550h, transparent.
2) Flood fill with background color.
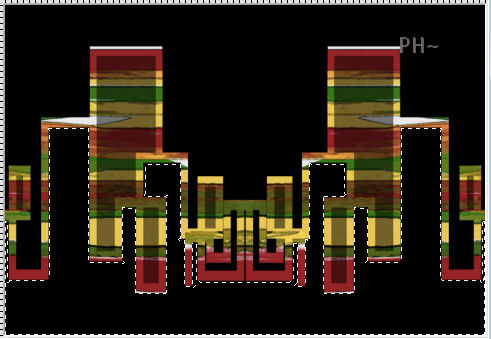
B) Abstract City
1)Layers - New Raster Layer.
2)Selections - Select All.
3)Maximize pattern_psppeg_cn.jpg - Copy (by right clicking title) - Paste - Paste Into Selection.
4)Selections - Select None.
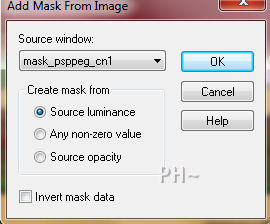
5)Layers - New Mask Layer - From Image - Select: mask_psppeg_cn1 - Source luminance - invert mask data unchecked.
6)Layers - Merge - Merge Group
7)Image - Resize - 75%, all layers unchecked.
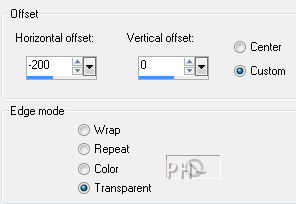
8)Effects - Image Effects - Offset - minus -200, 0, transparent.
C) Abstract City - Second Part
1)Layers - Duplicate
2)Image - Mirror
3)Layers - Merge - Merge Down
4)Magic Wand Tool - Tolerance 0, Feather 0, Anti-alias checked
Select an area on your canvas below the abstract city
5)Flood Fill White
Selections - Select None.
11)Layer Palette - Blend Mode: Normal, Opacity: 46.
D) Mask Layer
1)Layers - New Raster Layer.
2)Flood Fill White
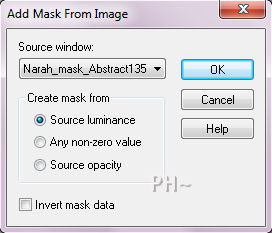
3)Layers - New Mask Layer - From Image - Select: Narah_mask_Abstract135 - Source luminance - invert mask data unchecked.
4)Layers - Merge - Merge Group.
5)Layer Palette - Blend Mode: Normal, Opacity: 65.
6)Mover Tool - Move the mask up just a little.
Layers - Merge - Merge Visable.
E)Foreground
1)Layers - New Raster Layer
2)Flood Fill Background Color.
3)Layers - New Raster Layer
4)Selections - Load/Save Selection - Load Selection From Disk - Select: psppeg_cn1.
5)Flood Fill Foreground Color.
6)Selections - Select - None.
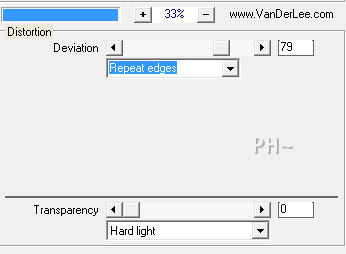
7)Effects - Plugins - VanDerLee - Unplugged X- Distortion
F)Foreground Second Part
1)Layers - Duplicate
2)Image - Mirror
3)Layer Palette - Turn off Visability of bottom layer.
4)Layers - Merge - Merge Visable.
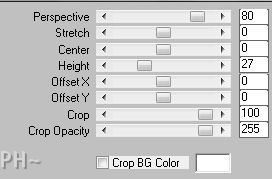
5)Effects - Plugins - Mura's Meister - Perspective Tiling - Settings: Reduce Height to 27.
6)Layer Palette - Turn Visability of Bottom Layer Back on.
G)Decorative Elements
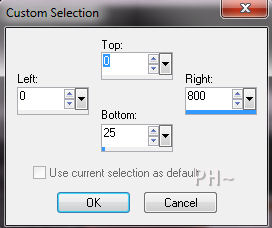
1)Selection Tool - Selection - Custom Selection - 0,0,800,25.
2)Layer - New Raster Layer
3)Flood Fill - Foreground Color.
4)Selections - Select None.
5)Effects - Plugins - Eye Candy 5 Nature - Drip - Settings Tab: Select Preset psppeg_cn_drip.
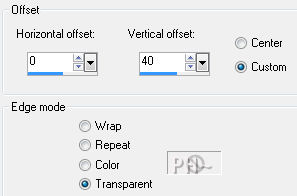
6)Effects - Image Effects - Offset - 0, 40, transparent.
H)Tubes ~ Main Tube
1)Maximize kikirou598_Catwoman_by_Ora - Copy - Paste - Paste As a New Layer
2)Image - Resize - 65%, all layers unchecked.
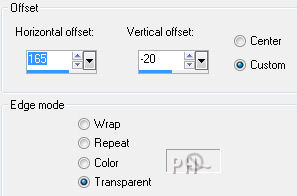
3)Effects - Image Effects - Offset - 165, minus -20, transparent.
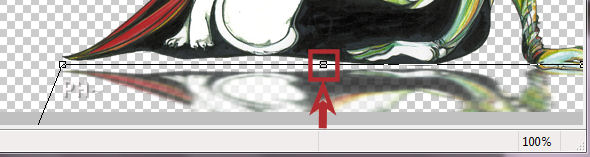
4)Effects - Plugins - Eye Candy 5 Impact - Perspective Shadow - Settings Tab: Reflect Infront
On the image portion of the Plugin slide the center node up.
I)Tubes ~ Tree Tube
1)Maximize tree_element1_psppeg_cn.psp - Edit - Copy - Close Tube - Edit Paste - As New Layer.
2)Mover Tool - Position to the left back area of foreground layer.
J)Borders
1)Layers - Merge - Merge All Flatten.
2)Edit - Copy
3)Image - Add Borders - Add a 50 pixel Symmetric Border in #ffffff.
4)Image - Add Borders - Add a 2 pixel Symmetric Border in #000000.
5)Edit - Paste - Paste As a New Layer.
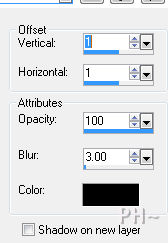
6)Effects - 3D Effects - Drop Shadow - 1, 1, 100, 3.00. #000000.
K)Finishing Up
1)Add your watermark
2)Add text - Text Included as text_psppeg_cn
3)Add Drop Shadow - Same Settings Except Reduce Blur to 1.00.
4)Layers - Merge - Merge All Flatten.
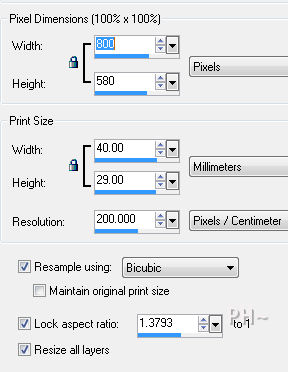
5)Image - Resize 800 pixels.
Your done.
The answer to the question what is a limited palette: It is the use of very few colors and only in limited areas. Black and White are neutral hues thus not actually considered a color. White and Black are used in paint to reduce or increase luminosity of paint.
Another Example
Home
©PSPPEG 2011
All Rights Reserved