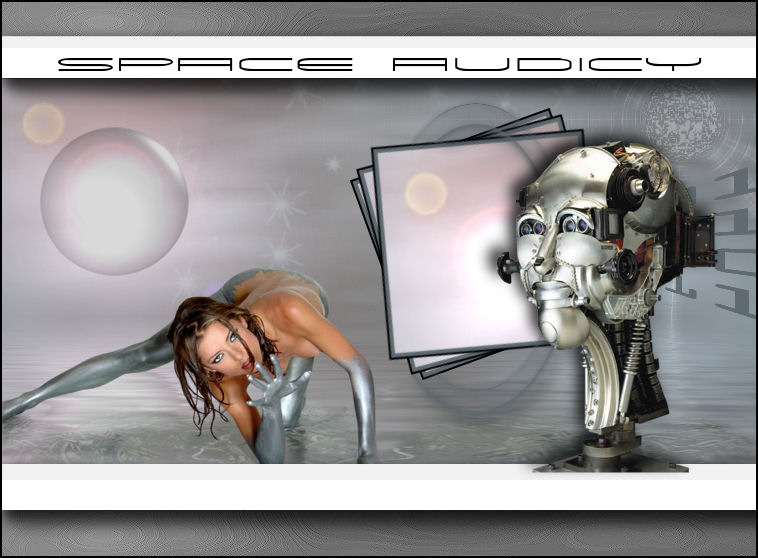
Space Audicy
Filters Required:
Filters Unlimited 2.0 - Lens Flares
Ulead - Particle
Flaming Pear - Solar Cell
Flaming Pear - Flood
Eye Candy 5 Impact - Extrude
If you need a filter..select the linked image below and scroll down the page.

------------------------
Tubes Required:
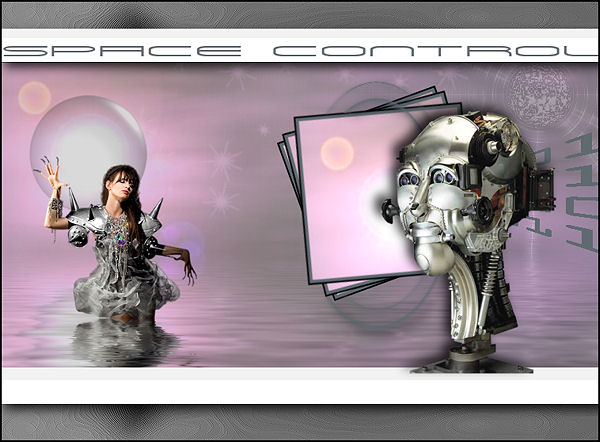
Main Tube by Maryse
Other Tubes by Guismo
These Tubers have provided psppeg with permission to use the tubes provided in this tutorial.
To view more Fantastic Tubes by these tubers click image below.
Many Thanks!
------------------------
Materials
------------------------
|
Preparation:
Look thru the list of filters and make certain you have them.
Open all tubes in your psp program and minimize.
Place Preset in Prset Folder of your Psp
_________________________________
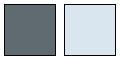
Material Palette - Set foreground to #5f6a71 and background to #d9e6ef or selectOne dark and one light colour to work with.
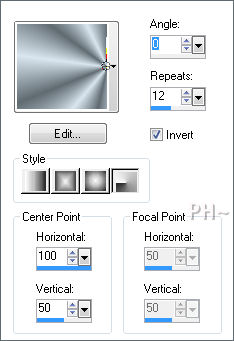
Set Foreground to Gradient - Style Radial, Gradient Foreground/Background, Angle 0, Repeats 12, Invert checked.
Colours Used:
Lets Begin:
A)Background
1)File, New Image, 760w x 400h, transparent.
2)Flood Fill with Gradient.
3)Layers Duplicate
4)Image - Mirror
5)Layers - Properties - Opacity: 50
6)Layers - Merge - Merge Down
7)Adjust - Blur - Gaussian Blur - Radius: 25
8)Effects - Plugins - Ulead - Particle - Clouds - Change the Cloud Colour
 :
:
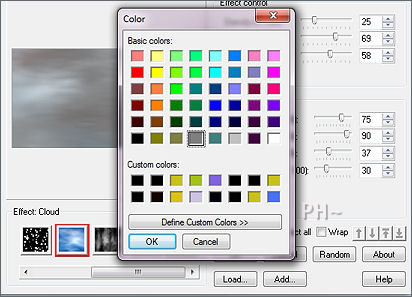
9)Effects - Plugins - Filters Unlimited 2.0 - Lens Flares - Flare 03 - Intensity: 144
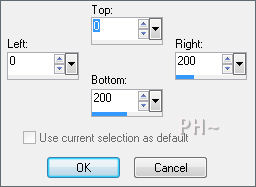
10)Selections Tool - Custom Selection
11)Edit - Copy - Edit - Paste - As a New Image - Minimize for later
12)Selections - Select None
B)Background Elements
1)Selections - Load/Save Selections - Load psppeg_so1.sel
2)Paint Brush Tool - Default Brush
3)Material Palette - Switch Colours so the light colour is in Foreground
4)Layers - New Raster Layer
5)Paint the Selection
6)Selections - Select None
7)Adjust - Blur - Gaussian Blur - Radius: 1
8)Layers - Properties - Blend Mode: Soft Light
C)Background Elements 2
1)Layers - New Raster Layer
2)Selections Tool - Custom Selection - Same Settings
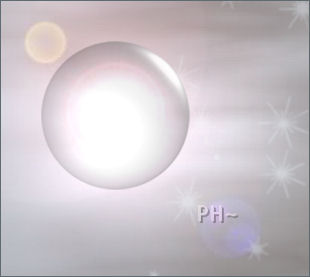
3)Effects - Artistic Effects - Ball and Bubbles
4)Load Preset - Clear Bubbles - Shapes Tab - Select Single Bubble

5)Image - Resize - 75%, all layers unchecked
6)Mover Tool - Position over largest lens light
D)Overlay
1)Layers - New Raster Layer
1)Flood Fill Foreground Colour
2)Effects - Plugins - Flaming Pear - Solar Cell

3)Image - Mirror
4)Layers - Properties - Blend Mode: Luminance Legacy, Opacity: 15
5)Adjust - Sharpen - Sharpen More
6)Effects - Edge Effects - Enhance More
E)Main Tube
1)Layers - Merge - Merge Visable
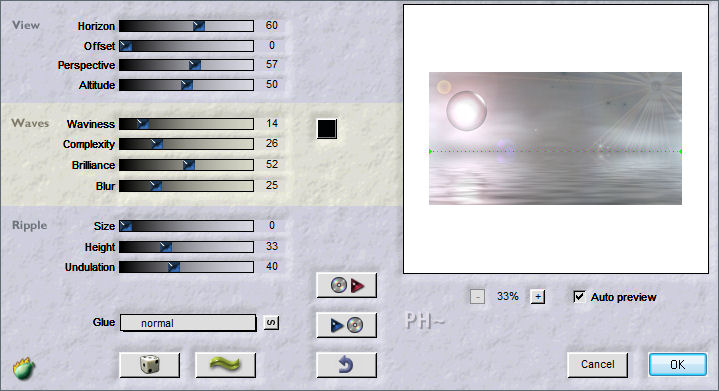
2)Effects - Plugins - Flaming Pear - Flood
3)Maximize MR_Lina.psp - Edit - Copy - Close image - Edit - Paste As a New Layer.
4)Image - Resize - 50%, all layers unchecked
5)Take your eraser tool and remove tubed by Maryse
6)Effects - Image Effects - Offset - H: minus 200, V: minus 90, transparent
7)Selections - Load/Save Selections - Load psppeg_so2.sel
8)Selections - Promote Selection to Layer
9)Image - Mirror
10)Hit your k Key on your keyboard - Slide the deformation to her arm
11)Eraser Tool - Default Brush - Size 32 - Opacity 67 - tap it a few times to remove the squareness of the watercap
12)Adjust - Sharpen - Sharpen
13)Layers - Merge - Merge Visable
F)Accent 1
Layers - New Raster Layer
Selections - Load/Save Selection - Load psppeg_so4.sel
1)Paint Brush Tool - Same Settings
2)Paint the Selection with your dark background colour
3)Selections - Select None
G)Accent 2
Layers - New Raster Layer
Selections - Load/Save Selection - Load psppeg_so3.sel
1)Maximize the small image you created
2)Image - Add Borders - 4 pixel symmetric border in your background colour
3)Image - Add Borders - 2 pixel symmetric border in black
4)Edit - Copy - Close Image - Edit Paste - Into Selection
5)Selections - Select None
6)Image - Free Rotate - 20.00 Left - all layers unchecked
7)Layers - Duplicate
8)Image - Free Rotate - 5.00 Right
9)Layers - Duplicate
10)Image - Free Rotate - 10.00 Right
11)Maximize element_1_psppeg.psp - Edit - Copy - Close Image - Edit - Paste - As a New Layer
12)Effects - Image Effects - Offset - H: 120, V: 11, transparent
Layers - Duplicate
H)Framing 1
1)Layer Palette - Bottom Layer - Edit - Copy - Edit - Paste - As a New Image - Minimize
2)Image - Add Borders - 1 pixels symmetric border - with your dark background colour
3)Image - Add Borders - 30 pixels border top and bottom, 0 left and right - White #ffffff.
4)Image - Add Borders - 50 pixels border top and bottom, 0 left and right - black #000000.
5)Magic Wand Tool - Feather and Tolerance 0, Mode: Add
6)Select Both White Borders
7)Selections - Promote Selection to Layer
8)Selections - Select None
9)Effects - Plugins - Eye Candy 5 Impact - Extrude - Settings Tab: Select psppeg_ext2
10)Effects 3D Effects - Drop Shadow 7,8,80,20.00
10)Layer Palette - Select Bottom Layer
10)Magic Wand Tool - Same Settings - Select Top black border
11)Layers - New Raster Layer
12)Maximize your background Image - Edit - Copy - Close Image - Edit - Paste - Into Selection (Keep Selected)
13)Effects - Texture Effects - Soft Plastic
Colour: #1b3efb

14)Effects - Edge Effects - Enhance
16)Layers - Properties - Blend Mode: Luminance Legacy, Opacity: 75
17)Selections - Select None
18)Layers - Duplicate
19)Image Flip
20)Layers - Merge - Merge All
21)Selections - Select All
22)Selections - Modify - Contract by 4 pixels
23)Image - Crop - Crop to Selection
I)Accent Tube
1)Maximize calguisrobot26022012.psp - Edit - Copy - Close image - Edit - Paste As a New Layer.
4)Image - Resize - 50%, all layers unchecked
5)Mover Tool - Position to the right - sitting on bottom white shelf
6)Effects - 3D Effects - Drop Shadow -7,-8,80,20.00
)Finalizing
1)Add your watermark
2)Add text
3)Image - Add Borders - 2 pixel symmetric border in black
Your done.
Another Example
Home
©PSPPEG 2011
All Rights Reserved