|
Preparation:
Look thru the list of filters and make certain you have them.
Open all tubes in your psp program and minimize.
Material Palette - Set foreground to #3099aa, or a color from your main tube, and background to #ffffff
Lets Begin:
A)Background Image
1)File, New Image, 760wx560h, white
2)Maximize aclis_eye_01_29_06_2011.psp - Edit - Copy - Close Image - Edit - Paste - As a New Layer
3)Image - Resize - 80%, all layers unchecked
4)Effects - Image Effects - Offset - Horizontal 100, Vertical 0, transparent
5)Layer Palette - Opacity: 75
6)Layers - Merge - Merge Visable
B)Background Elements
1)Layers - New Raster Layer
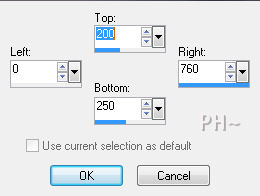
2)Selections Tool - Custom Selection
3)Flood Fill Foreground Color
4)Selections - Select None
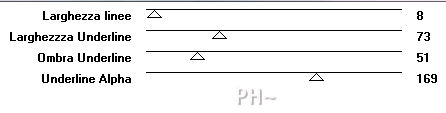
5)Effects - Plugins - Italian Editor - Effeto TV
Effects - Image Effects - Offset - Horizontal: 0, Vertical: 98, transparent
Layers - Merge - Merge Visable
C)Background Element 2
1)Layer - New Raster Layer
2)Selections - Load Selection - Load psppeg_be1.sel
3)Flood Fill with Foreground color
4)Selections - Modify - Contract by 1 pixel
5)Flood Fill White
6)Selections - Select None
7)Layers - Duplicate
8)Image - Mirror
9)Layers - Merge - Merge Down
10)Effects - Plugins - Italian Editors - Effetto Fantasma - Default Settings

11)Effects - Edge Effects - Enhance
12)Layers - Merge - Merge Visable
D)Background Elements
1)Layers - New Raster Layer
2)Selections - Load Selection - Load psppeg_be2.sel
3)Flood Fill Foreground Color
4)Effects - Plugins - Saphire 018 - Default
5)Selections - Select None
6)Material Palette - Switch the 2 colors making white the foreground color
7)Effects - Plugins - Toadies - What Are You - Default
8)Effects - Edge Effects - Enhance
9)Layers - Duplicate
10)Image - Mirror
D)Accent Tubes
1)Maximize accent1_psppeg_be.psp - Edit - Copy - Close image - Edit - Paste As a New Layer.
2)Effects - Image Effects - Offset - Horizontal: 0, Vertical: minus 250, transparent
3)Maximize accent2_psppeg_be.psp - Edit - Copy - Close image - Edit - Paste As a New Layer.
4)Layer Palette - Blend Mode: Multiply
5)Maximize accent3_psppeg_be.psp - Edit - Copy - Close image - Edit - Paste As a New Layer.
6)Mover Tool - Move tube up to touch top as shown

E)Main Tube
1)Maximize aclis_face_01_29_06_2011.psp
Edit - Copy - Edit - Paste - As a New Image
2)Layers - New Raster Layer
3)Layers - Arrange - Send to Bottom, Flood Fill White
4)Layer Palette - Highlight Top Layer
5)Layers - Duplicate
6)Layers - Merge - Merge All
7)Image - Resize - 60%, all layers checked
8)Material Palette - Left Click Your Main Color Material Properties Palette will Appear
Write Down the numbers beside R:, G:, B:
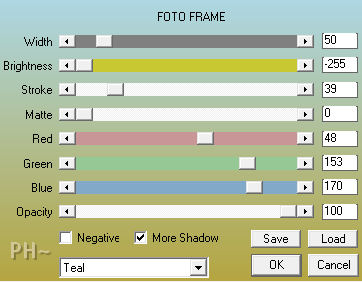
9)Effects - Plugins - AAA Frames - Foto Frame
10)Selections - Select All
11)Selections - Modify - Contract - 50 pixels
12)Selections - Invert
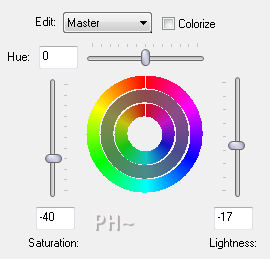
13)Adjust - Hue and Saturation - Hue/Saturation/Lightness
14)Selections - Select None
15) Edit - Copy - Close image - Edit - Paste As a New Layer.
16)Image - Resize - 80%, all layers unchecked.
17)Effects - Image Effects - Offset - Horizontal: minus 130, Vertical: 25, transparent
18)Effects - Plugins - Eye Candy 5 - Perspective Shadow - Settings Tab: Drop Shadow Blurry,
Reduce Overall Opacity to 70
J)Framing
1)Layers - Merge - Merge All
2)Image - Add Borders - 1 pixels symmetric border - with #3099aa.
3)Image - Add Borders - 20 pixels symmetric border - White #ffffff.
4)Image - Add Borders - 1 pixels symmetric border - with #3099aa.
K)Finalizing
1)Add your watermark
2)Add text, Text is provided if desired
3)Layers - Merge - Merge All Flatten.
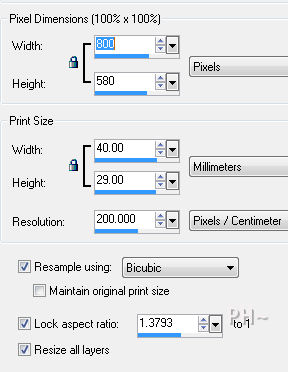
4)Image - Resize 800 pixels.
Your done.
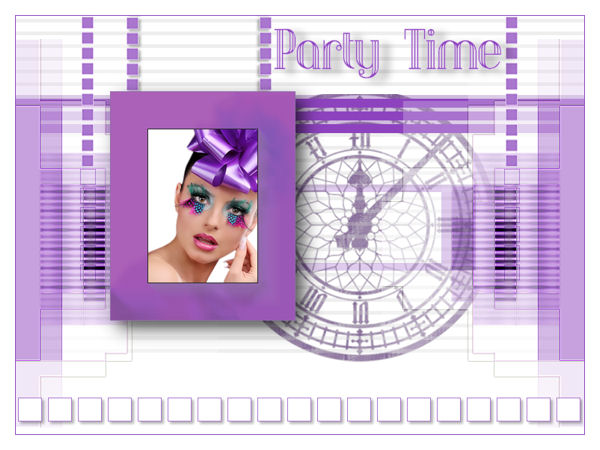
Another Example
|