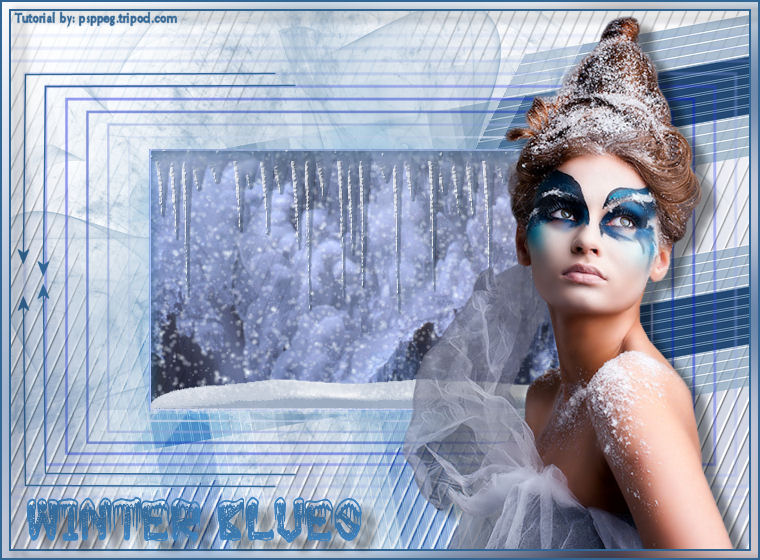
Winter Blues
Filters Required:
AP 01 Innovations - Lines
Eye Candy 5 Impact
Eye Candy 5 Nature
VDL Adrenaline
If you need a filter..select the linked image below and scroll down the page.

------------------------
Tubes Required:
Main Tube by Cladia Luna
Other Tubes also by psppeg
Claudia Luna has provided psppeg with permission to use the tubes provided in this tutorial.
To view more Fantastic Tubes by the Tuber Claudia Luna click image below.

Many Thanks Claudia
------------------------
Materials
------------------------
|
Preparation:
Place Selections in Selection Folder
Look thru the list of filters and make certain you have them.
Open all tubes in your psp program and minimize.
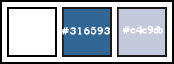
Material Palette - Set foreground to #c4c9db and background to #ffffff or select two light colors to work with.
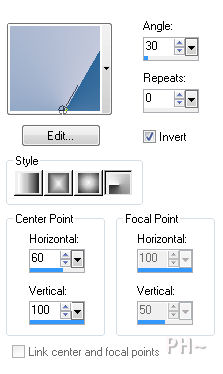
Set Foreground to Gradient - Style Linear, Gradient Foreground/Background, Angle 0, Repeats 0, Invert unchecked.
Lets Begin:
A)Background
1)File, New Image, 760wx560h, transparent.
2)Flood Fill with Gradient.
3)Layers Duplicate
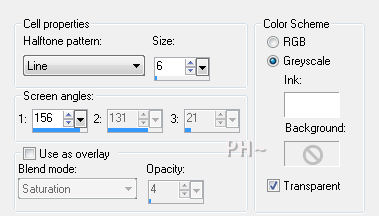
4)Effects - Artistic Effects - Half Tone
5)Effects - 3D Effects - Drop Shadow - 1, 1, 44, 1 - Black
6)Layers - Merge - Merge Visable
B)Background Elements
Layers - New Raster Layer
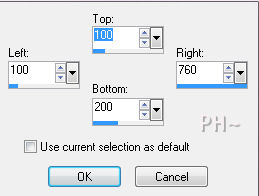
1)Selection Tool - Custom Selection
2)Freehand Selection Tool

3)Draw a triangle over the tip, making certain you divide the lower corner
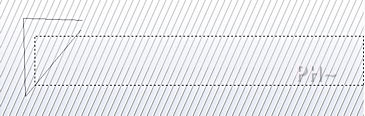
4)Material Palette - Change Background color to #316593 and change gradient
5)Flood Fill selection with gradient, Selections - Select None
6)Magic Wand Tool - Tolerance 30, feather 0, Mode: Add
7)Select the dark blue area
8)Effects - Plugins - AP 01 - Lines/ Silver Lining

9)Selections - Select None
10)Effects - Plugins - Toadies - What Are You - 20/20
11)Layers - Duplicate
12)Effects - Image Effects - Offset - 0, minus 230, transparent
13)Layers - Merge - Merge Down
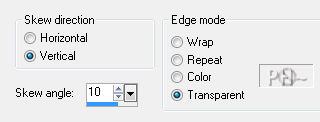
14)Geometric Effects - Skew
C)Background Elements Part 2
1)Layers - Duplicate
2)Layer Palette - Blend Mode: Multiply
Layers - Merge - Merge Down
3)Layers - Duplicate
4)Image - Free Rotate - 90%, to the right, All layers unchecked
5)Layer Palette - Blend Mode: Overlay
6)Layers - Duplicate
7)Effects - Plugins - Toadies - What Are You - Same Settings
8)Layers - Merge - Merge Down
D)Framing and adding Scenery
1)Layers - New Raster Layer
2)Selections - Select All
3)Selections - Modify - Contract - 150 pixels (Keep Selected Until told Otherwise)
4)Effects - 3D Effects - Cutout

5)Effects - Plugins - Eye Candy 5 - Backlight - Preset: psppeg_backlight1
6)Repeat Backlight
7)Maximize iceflow_psppeg_wb.psp - Edit - Copy - Close tube - Edit - Paste - Paste As a New Layer
Selections - Invert - Hit Delete Key
Selections - Invert
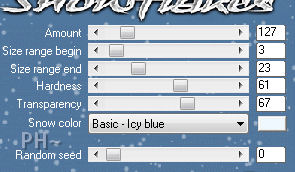
Effects - Plugins - VDL Adrenaline - Snowflakes
Selections - Select None
Layers - Arrange - Move Down
Layer Palette - Opacity: 85
E)Accent Tubes
1)Maximize - wb_arrows_pp.psp - Edit - Copy - Edit - Paste - As a New Layer
2)Effects - Image Effects - Offset - minus 225, plus 105, transparent
3)Effects - 3D Effects - Drop Shadow - Same Settings
4)Layers - Duplicate
5)Image - Flip
6)Maximize - wb_overlay_pp.psp - Edit - Copy - Edit - Paste - As a New Layer
7)Layer Palette - Opacity: 50
F) Adding Snow and Ice(Section F can be eliminated if using a different tube or scenery)
1)Selections - Load Selection - Load psppeg_wb1.sel
2)Layer - New Raster Layer
3)Effects - Plugins - Eye Candy 5 Nature - Icicles - Select Preset: psppeg_icicles1
4)Selections - Select None
5)Effects - 3D Effects - Drop Shadow - Same Settings
6)Layers - New Raster Layer
7)Selections - Load Selection - Load psppeg_wb2.sel
8)Effects - Plugins - Eye Candy 5 Nature - Snow Drift - Select Preset: psppeg_snowdrift1
9)Selections - Select None
10)Mover Tool - Move slightly down
G)Main Tube
1)Maximize tubeclaudiaviza-mujer2274.psp - Edit - Copy - Close image - Edit - Paste As a New Layer.
2)Image - Resize - 80%, all layers unchecked.
3)Effects - 3D Effects - Drop Shadow - Same Settings
4)Mover Tool - Position to the right edge of center frame
H)Framing
1)Layers - Merge - Merge All
2)Layers - New Raster Layer
3)Flood Fill with #316593
4)Selections - Select All
5)Selections - Modify - Contract 2 pixels - Hit your Delete Key
6)Selections - Modify - Contract 7 pixels - Flood Fill Same Color
7)Selections - Modify - Contract 2 pixels - Hit your Delete Key
8)Selections - Select None
9)Magic Wand Tool - Select the area between the two Frame lines
10)Layer Palette - Select Bottom Layer
11)Adjust - Blur - Gaussian Blur - Radius 40 - Selections - Select None
12)Layer Palette - Select top Layer
13)Effects - 3D Effects - Drop Shadow - Same Settings
14)Layers - Merge - Merge All.
J)Finalizing
1)Add your watermark
2)Add text
3)Layers - Merge - Merge All Flatten.
Your done.
Another Example
Home
©PSPPEG 2011
All Rights Reserved