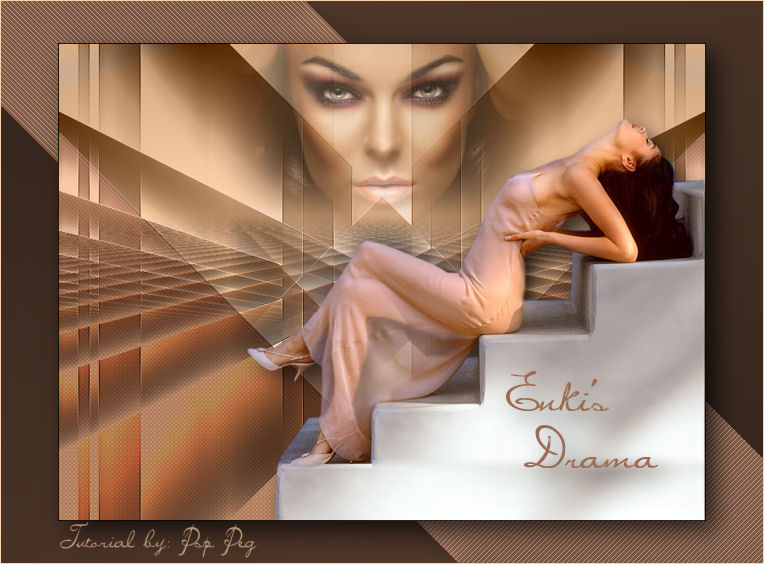
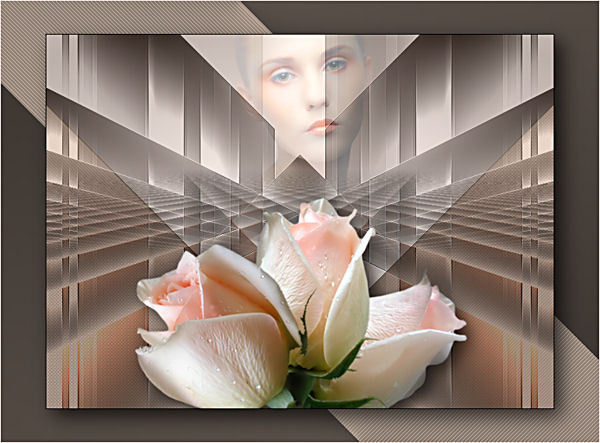
Enki's Drama
Filters Required:
Eye Candy 5 Impact
Transparancy - Eliminate Black
AP 01 Innovations - Lines
Harry's Rave Grad's
Enki's - Wallpaper Deluxe, Jon Mullen's Japanese Fan
If you need a filter..select the linked image below and scroll down the page.

------------------------
Tubes Required:
Main Tube by Ivone
Other Tube by Luz Cristina
Both tubers have provided psppeg with permission to use the tubes in this tutorial.
To view more Fantastic Tubes by these tubers click image below.

Many Thanks!
------------------------
Materials
------------------------
|
Preparation:
Look thru the list of filters and make certain you have them.
Open both tubes in your psp program and minimize.
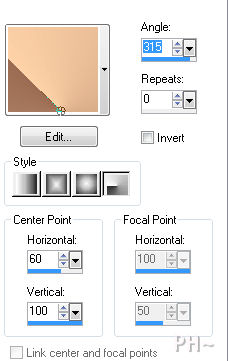
Material Palette - Set foreground to #fed2a8 and background to #9b6c53 or select one light and one medium colors to work with. Set Foreground to Gradient - Style Radial, Gradient Foreground/Background, Angle 315, Repeats 0 Invert unchecked.
Lets Begin:
A)Floor
1)File, New Image, 760wx560h, transparent.
2)Flood Fill with Gradient.
3)Effects - Plugins - Enki's Filters - Wallpaper Deluxe
(4)Adjust - Colorize - Colorize to match your background color) - Only if using a different color
5)Effects - Plugins - Enki's Filters - Jon Mullen's Japanese Fan

6)Effects - Plugins - Transparency - Eliminate Black
7)Effects - Image Effects - Offset - Horizontal 200, Vertical minus 200, transparent.
8)Layers - Duplicate
9)Image - Mirror
10)Layers - Merge - Merge Down
11)Effects - Edge Effects - Enhance
12)Layer Palette - Turn Visibility of this Layer Off
B)Background
1)Layers - New Raster Layer
2)Flood Fill with Gradient
3)Layers - Arrange - Move Down
4)Layers - Duplicate
5)Image - Mirror
6)Layer Palette - Opacity: 50
7)Layers - Merge - Merge Down
8)Effects - Edge Effects - Enhance
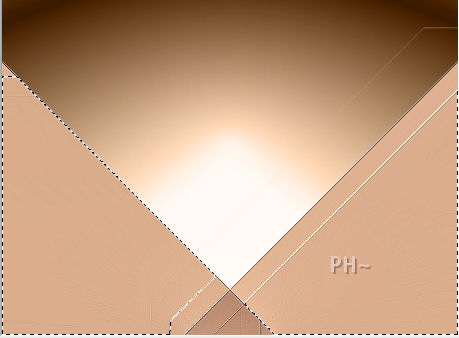
C)Background Elements
1)Magic Wand

2)Select the top area
3)Selection - Promote Selection to Layer
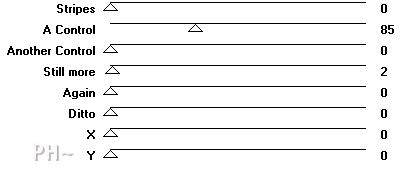
4)Effects - Plugins - Harry's Rave Grads - Mystic Mountain
5)Selections - Select None
6)Layer Palette - Blend Mode: Luminance Legacy, Opacity: 85
D)Background Elements 2
1)Layer Palette - Select Bottom Layer
1)Magic Wand - Same Settings
2)Select the two outer corners
3)Selection - Promote Selection to Layer
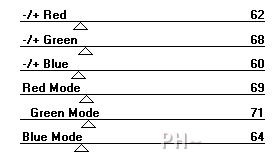
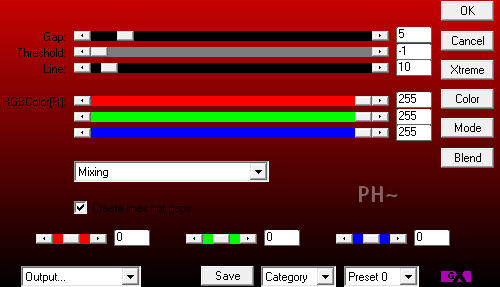
4)Effects - Plugins - AP01 Innovations - Lining - Silver Lining
5)Layer Palette - Blend Mode: Multiply, Opacity: 46
6)Layers - Merge - Merge Down
7)Selections - Select None
E)Distant Face
1)Layer Palette - Select Top Layer
1)Maximize - 2949-luzcristina.psp - Edit - Copy - Close Tube - Edit - Paste - Paste as a New Layer
2)Image - Resize - Resize 65%, all layers unchecked
3)Effects - Image Effects - Offset - Horizontal 0, Vertical 200, transparent
4)Layer Palette - Opacity: 70
F)Background Elements 3
1)Layer Palette - Turn Visibility of Layer Second from the top Back On and Select Layer
2)Layers - Duplicate
3)Image - Flip
4)Layer Palette - Blend Mode: Luminance Legacy, Opacity: 65
5)Layer Palette - Select Layer Below
6)Layer Palette - Blend Mode: Multiply
E)Main Tube
1)Layer Palette - Select Top Layer
2)Maximize Ivo-Exatsis.psp - Edit - Copy - Close image - Edit - Paste As a New Layer.
4)Image - Resize - 65%, all layers unchecked. Repeat
5)Mover Tool - Position touching bottom and right sides
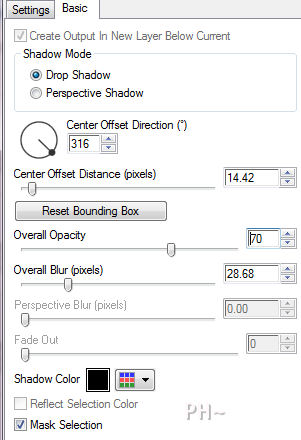
6)Effects - Plugins - Eye Candy 5 Impact - Drop Shadow - Drop Shadow, Blurry
Basic Tab - Reduce Overall Opacity to 70
J)Framing
1)Layers - Merge - Merge All
2)Image - Add Borders - 1 pixels symmetric border - with #000000, black.
3)Layers - Promote Background to Layer
4)Image - Resize - Resize 85%, all layers unchecked
5)Layers - New Raster Layer
6)Change Background Color to Black, Foreground to #9b6c53, same gradient
7)Layers - Arrange - Send to bottom
8)Flood Fill with Gradient
9)Layers - Duplicate
10)Image - Mirror, Image Flip
11)Layer Palette - Opacity: 50
12)Layers - Merge - Merge Down
14)Magic Wand - Same Settings
15)Select the Center, Lighter Color
16)Selections - Promote Selection to Layer
17)Effects - Plugins - AP01 Innovations- Lining - Silver Lining - Same Settings
18)Selections - Select None
19)Layer Palette - Opacity: 40
20)Layer Palette - Select Top Layer
21)Effects - Plugins - Eye Candy 5 Impact - Drop Shadow - Same Settings
22)Layers - Merge - Merge All
23)Image - Add Borders - 1 pixels symmetric border - with #fed2a8.
K)Finalizing
1)Add your watermark
2)Add text
3)Layers - Merge - Merge All Flatten.
Your done.
Another Example
Home
©PSPPEG 2011
All Rights Reserved