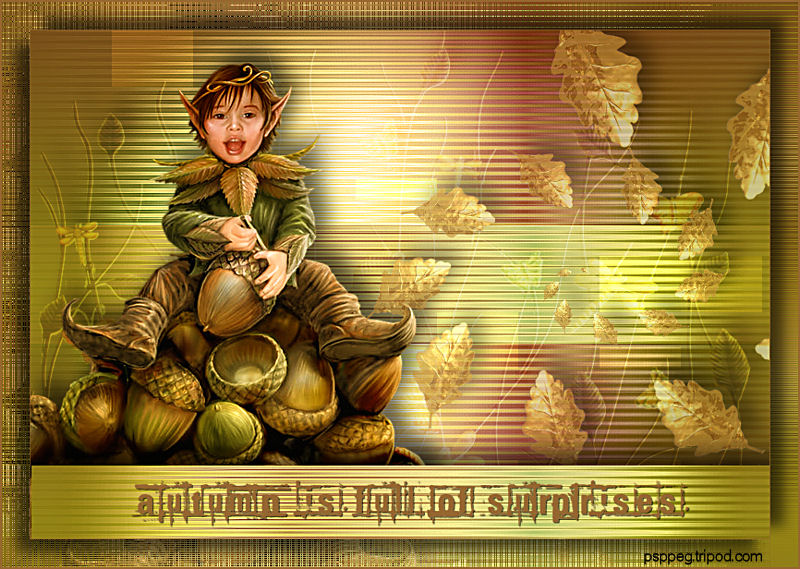
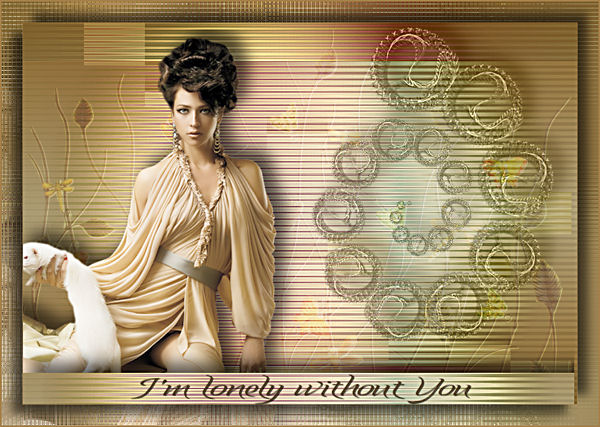
Autumn Surprises
Filters Required:
Filter Factory Galery A - Spot Light
Filter Factory Galery H - Jumble
Filter Factory Galery M - Motion Trail
Filter Factory Galery V - Poster Gradient
Mura Meisters - Copies
If you need a filter..select the linked image below and scroll down the page.

------------------------
Tubes Required:
Main Tube by Guismo
Other Tubes also by Guismo
Sév_Guismo has provided psppeg with permission to use the tubes provided in this tutorial.
To view more Fantastic Tubes by the Tuber Sév_Guismo click image below.

Many Thanks Sev
------------------------
Materials
------------------------
|
Preparation:
Look thru the list of filters and make certain you have them.
Open all tubes in your psp program and minimize.
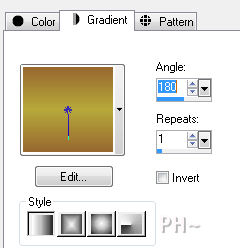
Material Palette - Set foreground to #976730 and background to #b7a93b or select two medium colors to work with. Set Foreground to Gradient - Style Linear, Gradient Foreground/Background, Angle 180, Repeats 1, Invert unchecked.
Lets Begin:
A)Background
1)File, New Image, 800wx550h, transparent.
2)Flood Fill with Gradient.
3)Layers Duplicate
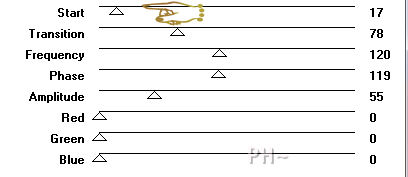
4)Effects - Plugins - Filter Factory Gallery V - Poster Gradient I - Default

5)Effects - Plugins - Filter Factory Gallery M -Motion Trail
6)Effects - Plugins - Filter Factory Gallery A -Spot Light - Default
7)Layer Palette - Blend Mode: Luminance Legacy
8)Layers Duplicate
9)Layer Palette - Blend Mode: Soft Light, Opacity: 45
10)Layers - Merge - Merge Visable
11)Effects - Edge Effects - Enhance
B)Background Elements
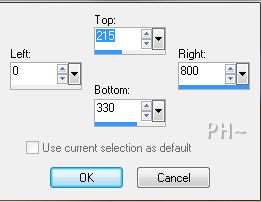
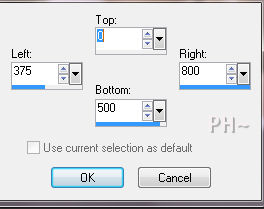
1)Selection Tool - Custom Selection
2)Selections - Promote Selection to Layer
3)Selections - Select None
4)Effects - Image Effects - Offset - Horizontal 0, Vertical minus 250, transparent
5)Effects - 3D Effects - Drop Shadow - minus 15, 14, 57, 30, black
C)Background Elements 2
1)Layers - Duplicate
2)Effects - Plugins - Filter Factory Gallery H - Jumble

3)Layer Palette - Blend Mode: Soft Light, Opacity: 35
D)Accent Tube 1
1)Layer Palette - Select Bottom Layer
1)Maximize calguisdecor30810.psp - Edit - Copy - Close image - Edit - Paste As a New Layer.
2)Image - Resize - 80%, all layers unchecked.
3)Mover Tool - Move tube Down
4)Layer Palette - Blend Mode: Overlay, Opacity: 40
E)Main Tube
1)Layer Palette - Select Top Layer
2)Layers - Arrange - Move Down
3)Maximize calguisLutin10092011.psp - Edit - Copy - Close image - Edit - Paste As a New Layer.
4)Image - Resize - 80%, all layers unchecked.
5)Effects - 3D Effects - Drop Shadow - Same Settings
F)Accent Tube
1)Maximize calguisFeuilleOr4092011.psp - Edit - Copy - Close image - Edit - Paste As a New Layer.
2)Image - Resize - 40%, all layers unchecked
3)Mover Tool - Move to the center area beside the boy, on the line
4)Selections Tool - Custom Selection
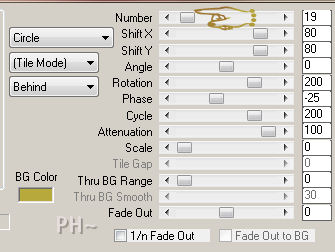
3)Effects - Plugins - Mura Meisters Copies - Spiral
4)Effects - 3D Effects - Drop Shadow - Same Settings
5)Layer Palette - Opacity: 60
J)Framing
1)Layers - Merge - Merge All - Edit - Copy
2)Image - Add Borders - 1 pixels symmetric border - with #976730.
3)Image - Add Borders - 30 pixels symmetric border - White #ffffff.
4)Magic Wand Tool - Tolerance and Feather 0 - Select the White Border
5)Edit - Paste - Paste Into Selection
6)Adjust - Blur - Gaussian Blur - Radius: 30
7)Effects - Plugins - Filter Factory Gallery M - Loom - Default
8)Selections - Invert
9)Effects - 3D Effects - Drop Shadow - minus 14, plus 15, 57, 20, black
10)Repeat Drop Shadow changing values to plus 14, minus 15.
11)Selections - Select None
12)Image - Add Borders - 2 pixel symmetric border in #976730
14)Layers - Merge - Merge All.
K)Finalizing
1)Add your watermark
2)Add text
3)Layers - Merge - Merge All Flatten.
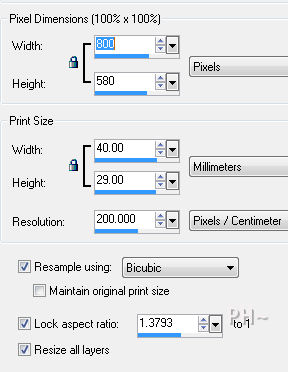
4)Image - Resize 800 pixels.
Your done.
Another Example
Home
©PSPPEG 2011
All Rights Reserved