1925
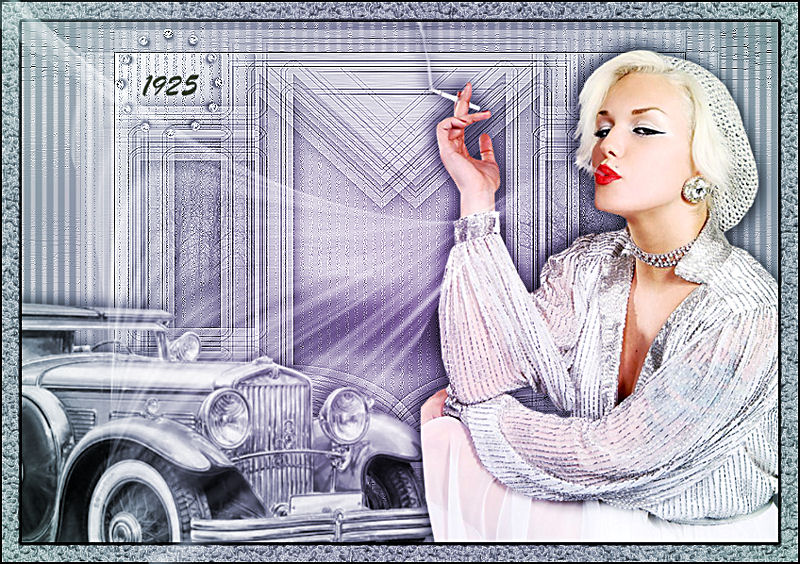
Retro Art - Art Deco Tutorial
Filters Required:
Alien Skin 2 Xenoflex - Constellation
Eye Candy 5 Impact - Brushed Metal
Toadies - What Are You
If you need a filter..select the linked image below and scroll down the page.

------------------------
Tubes Required:
Main Tube and car by Gina
Landscape
element
Mask
Main tube was created by Gina which can be found Here
Many Thanks Gina for allowing me to use your tubes.
------------------------
Materials
------------------------
|
Preparation:
Look thru the list of filters and make certain you have them.
Open all tubes and mask in your psp program and minimize.
Lets Begin:
A)Background
1)File, New Image, 800wx550h, transparent.
2)Flood Fill with #c0c0c0
3)Effects - Plugins - Filter Factory Gallery N - Bulging Edge Shader

B)Background Design
1)Layers - New Raster Layer
2)Flood Fill White
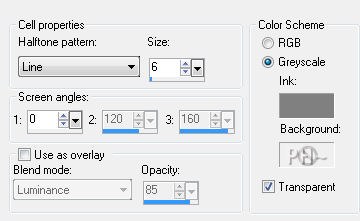
3)Effects - Artistic Effects - Half Tone
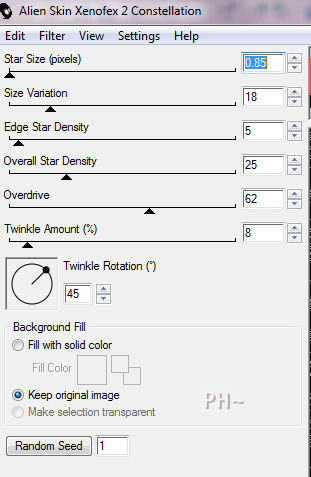
4)Effects - Plugins - Alien Skin Xenoflex - Constellation
5)Effects - Edge Effects - Enhance
C)Mask Layer
1)Layers - New Raster Layer
2)Flood Fill with #c0c0c0
3)Layers - New Mask Layer - From Image - Select mask_psppeg1925, source luminance, invert mask data not checked

4)Layers - Merge - Merge Group
5)Effects - Plugins - Eye Candy 5 Impact - Brushed Metal - Settings Tab: Linear Steel - Default Settings

D)Mask Layer Design 1
1)Selections - Select All - Select Float - Select Modify - Contract - 47 pixels
2)Layers - New Raster Layer
3)Flood Fill with #808080 - (Keep Selected Until Notified Otherwise)
5)Selections - Modify - Contract 2 pixels - Hit the Delete Key on your Keyboard
5)Selections - Modify - Contract 5 pixels - Flood Fill Same Color, Repeat Flood Fill
6)Selections - Modify - Contract 2 pixels - Hit the Delete Key
7)Selections - Select None.
E)Mask Layer Design 2
Layer Palette - Select the Layer your Mask is on called Group - Raster 3
1)Selections - Select All - Select Float - Select Modify - Contract - 10 pixels
2)Layers - New Raster Layer
3)Flood Fill with #808080 - (Keep Selected Until Notified Otherwise)
4)Selections - Modify - Contract 2 pixels - Hit the Delete Key on your Keyboard
5)Selections - Modify - Contract 5 pixels - Flood Fill Same Color, Repeat Flood Fill
6)Selections - Modify - Contract 2 pixels - Hit the Delete Key
7)Selections - Select None.
F)Finishing The Mask Layer Design
1)Layer Palette - Select Top Layer
2)Layers - Merge - Merge Down
3)Effects - 3D Effects - Drop Shadow - 1, 1, 60, 1 white.
4)Repeat Drop Shadow with minus value 1, 1.
5)Layers - Merge - Merge Down
G)Adding the Landscape
1)Magic Wand Tool - Feather and Tolerance 0 - Mode: Add
2)Select the 3 centers within the mask
3)Selections - Modify - Expand by 2 pixels (Keep Selected)
4)Layer Palette - Select the Layer Below the Mask
5)Maximize Landscapes_West_Highlands_Scotland.psp - Edit - Copy - Edit - Paste - Paste As a New Layer
6)Selections - Invert - Hit the Delete Key on your keyboard
7)Selections - Select None.
8)Layer Palette - Select the Mask Layer
9)Effects - 3D Effects - Drop Shadow - 6, 6, 60, 20, black.
10)Repeat Drop Shadow with minus 6, 6.
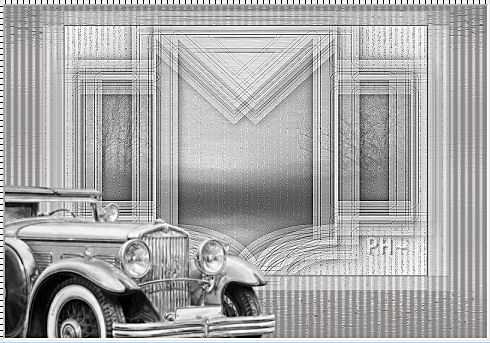
H)Finishing Center Image
1)Layers - Merge - Merge All
2)Image - Add Borders - Add a 1 pixel symmetric border in black
3)Layers - Promote Background Layer
4)Image - Resize - 80%, all layers unchecked.
5)Adjust - Sharpen - Sharpen
6)Effects - Plugins - Toadies - What Are You - 12, 12.

Effects - Image Effects - Offset 0, 35, transparent
I)Second Background
1)Layers - New Raster Layer
2)Layers - Arrange - Send to the Bottom
3)Material Palette - Change Foreground Color to Gradient - Select a Steal Metal Gradient - Coral_06_020 - Style Linear
4)Flood Fill with Gradient
5)Adjust - Blur - Gaussian Blur - Radius: 50.
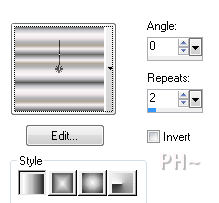
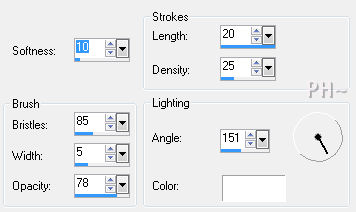
6)Effects - Art Media Effects - Brush Strokes
7)Effects - Edge Effects - Enhance
J)Background 2 Design
1)Layers - New Raster Layer
2)Flood Fill with #808080
3)Effects - Artistic Effects - Half Tone - Same Settings
4)Layer Palette - Opacity: 75
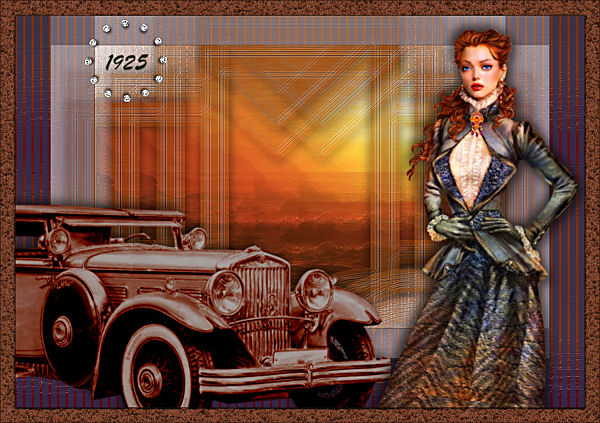
K)Adding the Tubes
1)Layer Palette - Select Top Layer
2)Maximize GINATUBES_DIVERS_VOITURE_307.psp - Adjust - Hue and Saturation - Colorize - Reduce Saturation to 0
3)Edit - Copy - Close Tube - Edit Paste - As a New Layer
4)Mover Tool - Position to bottom left
5)Effects - 3D Effects Drop Shadow minus 6, 6, 60, 20, black.
6)Maximize GINATUBES_Femme_1796.psp - Edit - Copy - Close Tube - Edit Paste - As a New Layer
7)Image - Resize - 80%, all layers unchecked
8)Mover Tool - Position Bottom Right Corner
9)Effects - 3D Effects - Drop Shadow - Same Settings
10)Repeat Drop Shadow with Negative 6, 6.
11)Maximize text_psppeg1925.psp - Edit - Copy - Close Tube - Edit Paste - As a New Layer
12)Mover Tool - Position Top Left Corner
L)Framing
1)Layers - Merge - Merge All
2)Image - Add Borders - 1 pixels symmetric border - Black #000000.
3)Image - Add Borders - 20 pixels symmetric border - #c0c0c0.
4)Magic Wand Tool - Same Settings - Select the Last Border
5)Adjust - Add/Remove Noise - Add Noise - Gaussian, 30%, Monochrome checked.
6)Change Foreground to White
7)Effects - Artistic Effects - Hot Wax Coating
8)Image - Add Borders - 2 pixels symmetric border - Black #000000.
9)Selections - Select None.
9)Maximize element1_psppeg1925.psp - Edit - Copy - Close Tube - Edit - Paste - Paste As a New Layer.
10)Effects - Image Effects - Offset - minus 200, 75, transparent.
11)Layers - Merge - Merge All.
M)Adding Extra Color ~ Optional
1)Layers - New Raster Layer - Flood Fill White
2)Effects - Plugins - Filter Factor Gallery M - Ambrosia - Default Settings
3)Effects - Plugins - Simple - 4 Way Average
4)Effects - Plugins - Adjust - Variations - Select a color scheme.
5)Layer Palette - Blend Mode: Overlay, Opacity: 65.
K)Finalizing
1)Add your watermark
2)Layers - Merge - Merge All Flatten.
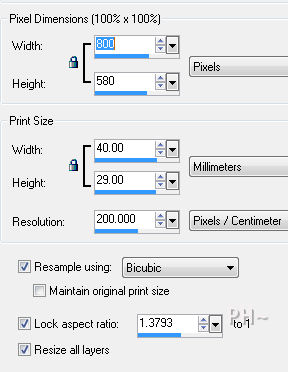
3)Image - Resize 800 pixels.
Your done.
Another Example
Home
©PSPPEG 2011
All Rights Reserved